Vegetables & Cheese Sandwich Recipe


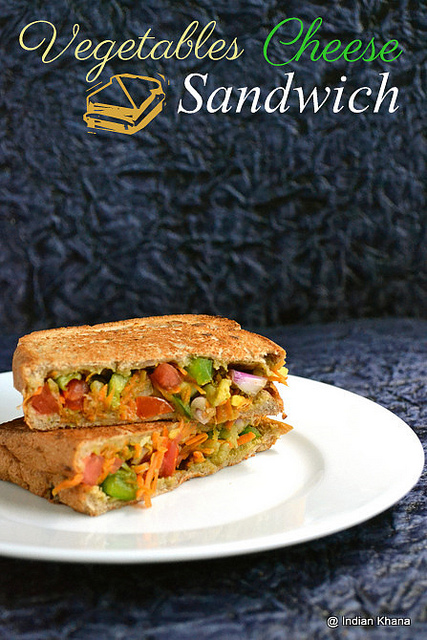
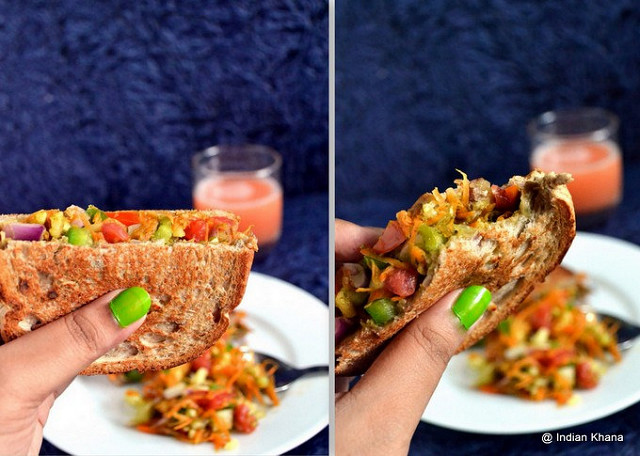
Do you like sandwich specially for breakfast or snack? I like because it's simple, easy and quick to prepare. We can do lot of variations in sandwich filling to suit our taste.  This is one of easy sandwich toast recipe again with lots of vegetables plus goodness of cheese.  I used less of cheese because I made this only for myself, you can reduce cheese too if you like or for kids you can add it generously.  Cheese helps to bind the vegetables well so they doesn't keep sneaking out of sandwich :) in my sandwich if you don't see cheese oozing out then don't be surprise.


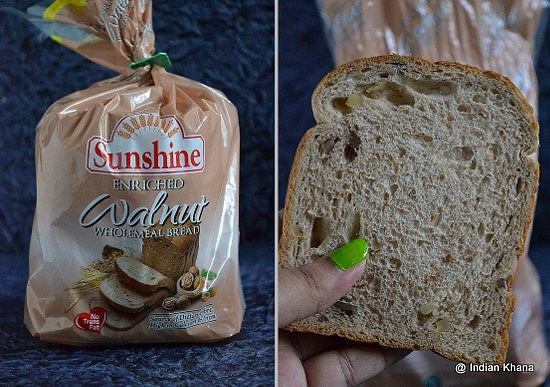
The good thing about this simple vegetable filling is you can also use it as salad, it taste spicy, yum and refreshing due to all raw vegetables.  Good option is to use sandwich maker to toast these sandwich this way vegetables get's cooked well and cheese melt nicely, but to show the filling I didn't use my toaster once again, also I have used wholemeal walnut bread, it's add good walnut crunch to the sandwich.  Next time if you happen to see wholemeal walnut bread perhaps you can give a try.


Other Sandwich & Toasts Recipes you can check out

Ingredients for Vegetables & Cheese Sandwich

[Makes 2 Sandwich Set]

Bread Pieces - 4
Grated Cheese - 1/4 Cup [more if preferred]
Chopped Onion - 1/4 Cup
Chopped Tomato - 1/4 Cup
Chopped Cucumber - 1/4 Cup
Chopped Capsicum - 1/4 Cup
Grated Carrot - 1/2 Cup
Green Chutney - 1 tbsp [or use Sandwich Chutney]
Chaat Masala - 1 tsp


Method:

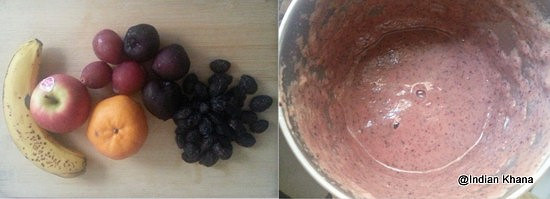
1. Finely chop onion, tomato, cucumber, capsicum and grate carrot & gather all our ingredients.


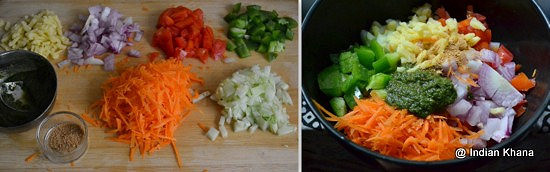
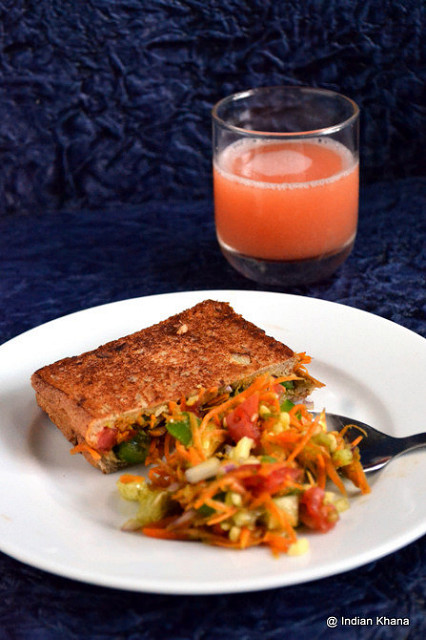
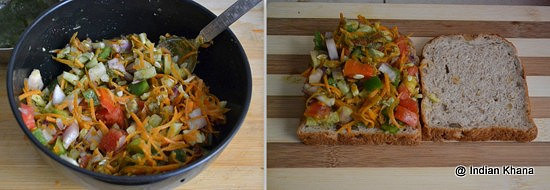
2. In a bowl add all the vegetables, cheese, green chutney, chat masala and mix well.  Add generous amount of prepared mixture around 3-4 spoons on top of bread and place another pieces of bread to cover.

~ Here is picture of whole meal walnut bread.


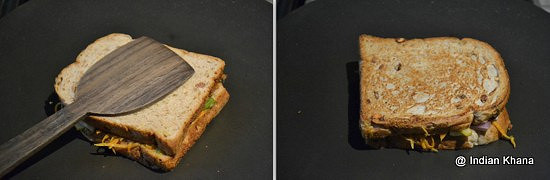
3. Heat a griller or tawa and toast bread both sides until brown.  We can press the bread sightly to seal all the veggies inside.

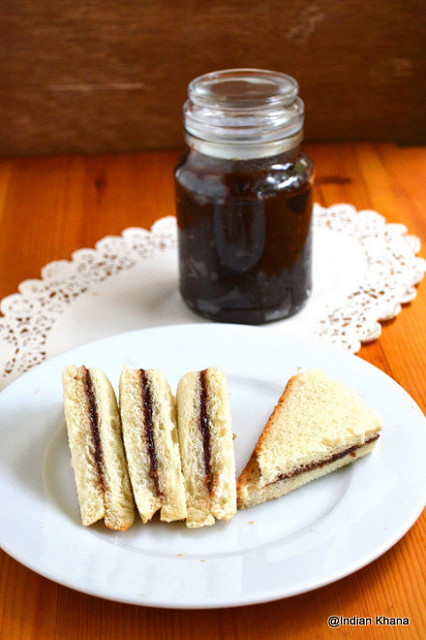
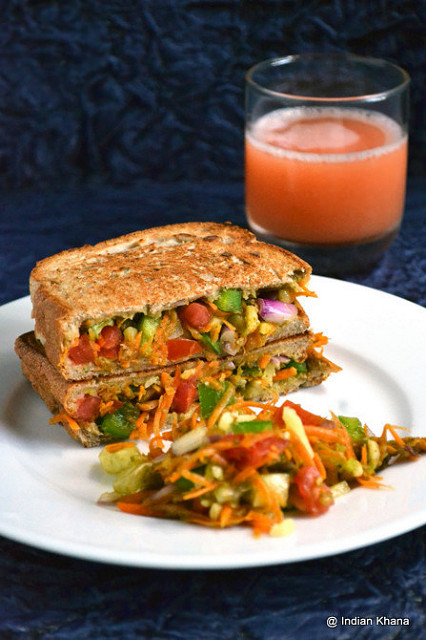
Serve warm with tea/coffee or juice.


~ Variations 
  • Use any vegetables of your choice like grated beetroot, boiled potato etc
  • You can make this in griller or sandwich toaster.
  • Apply butter on bread if preferred
  • Since we use green chutney &chat masala, salt is not needed.  Add salt & pepper if required.  
  • You can add 1 tbsp of chopped walnut for a nice crunch, since I used walnut bread it give good nutty crunch to the sandwich.
Have a nice day ~~


Chana Dal Namkeen | Chana Dal Moth


Chana dal namkeen or dal moth is one of popular snack in North India along with mong dal moth.  My mom used to make this for Holi, Diwali or just for a snack.  This is one of most easy namkeen recipe with minimal ingredients easily available in your pantry.  It's spicy, tangy, crunchy, tasty and that's why also known as dal moth chaat.


Pair with tea or coffee it's a great tea time snack, perfect to munch on and have a book to read, what else we can ask for.  I make this in small batches but my mom used to do in large batch which use to last for months.  We can do the same with mong dal and dal moth is actually made from whole masoor dal, Agre ki dalmoth is made from whole moth dal which goes as namkeen/mixture with thin sev or we can also use ompodi, fried cashews etc.


Since Holi is around the corner I thought of posting this simple namkeen recipe, you can make this well in advance to have a hassle free holi celebration.  Try this and you going to love it.


Other Namkeen/Snacks Recipes you can check out 

Ingredients for Chana Dal Namkeen or Chana Dal Moth

Shelf Life - 2-3 Months

Chana Dal - 1 cup
Oil - To Deep Fry
Salt - 1/4 tsp or To Taste
Chilli Powder - 1 tsp
Citrus Acid - 1/2 tsp or Amchur (Dry Mango) Powder - 1/2 tsp


Method:

1. Wash and soak chana dal 3-4 hours or over night.
2. Rinse again 2-3 times and spread evenly washed dal in a kitchen towel or thick cotton cloth for 15-20 minutes so all the water is absorbed and dal becomes dry.
~ If required, change towel to make dal dry.

3. Heat oil in a wok(kadai) until smoking point, add dal in batches and fry until golden brown/crispy or until the 'shh' sounds eases from oil and keep in kitchen tissue to remove excess oil.

~ You can see in the above & below pictures bubbles in oil while dal was added and when the dal gets fried there's almost no bubbles remains.

4. Repeat same for rest of dal.
5. Once all the dal gets fried, add salt, chilli powder and citrus (or amchur powder) and mix well.   Allow the mixture to cool completely before storing in air-tight container.

Here our chatpata Chana Dal namkeen is ready.


Variations ~
~ You can add crushed black pepper and black salt.
~ You can do same with Moong Dal.

Have a nice day ~~

Homemade Ginger Garlic Paste Recipe


Ginger-Garlic paste is used regular in Indian cooking, most of the curry calls for ginger-garlic paste and ofcourse we all love this one don't we? So did you ever wonder how to make ginger-garlic paste at home? Nothing beats fresh home made ginger-garlic paste.  I never really liked store ginger-garlic paste; not only they look dull but after a while it smell weird and perhaps taste too,  I always prefer to make my own paste or I freshly mince ginger-garlic, a habit which I am hooked too but then to cut short the mincing time I prepare paste and keep in fridge to make it handy on weekdays.


Most of you may already know how to make ginger-garlic paste at home as there is no rocket science involve in this but for those few people whom still prefer to buy it this recipe is for you, try at home and then you will never look back. I learnt this from my sister she used to make this in large batch over weekend and add turmeric powder+oil.  I follow same, turmeric powder & oil helps to keep paste fresh for longer time ie it's works as preservatives and doesn't get the paste color change after a while.


Though making ginger-garlic paste at home is easy, the only difficult or time consuming task is to peel garlic and if you happen to have Indian garlic which has small pods then it's more painful.  But here what I do, I normally do the peeling while watching TV, and it helps me in doing it with my own pace without realizing that I am doing any work, just be a little mindful of knife you are using in case to peel it.  For other useful tips on how to peel garlic read below.

Ingredients for Ginger Garlic Paste

Chopped Ginger - 1 Cup
Garlic Cloves - 1 Cup
Turmeric Powder - 1 tsp
Oil - 1 tbsp


Method:

1. Rinse and peel ginger, chop in pieces.
~ You can use knife or peeler to do this job.
2. Peel garlic and chop if desire. [ Check below for tips to peel garlic]

3. Grind together ginger, garlic, turmeric powder and oil into smooth paste, check with a spoon if any garlic or ginger pieces left, if yes, give a run again.

4. Use clean, dry spoon and store in clean, dry glass bottle or box and refrigerate.


Shelf Life ~3-4 Weeks

Shelf life of this ginger-garlic paste can be 3 to 4 weeks or little more but I don't like to use it for long time so I always make this to last me for a month or less, which is the quantity I mention above.   Always use a clean, dry spoon to take out paste.

Notes ~

~ Always use clean dry spoon, if not paste may change color and get spoil soon.
~ Keep the paste in fridge always, don't let the paste sit on your kitchen worktop.
~ 1:1 ratio works best for ginger-garlic paste so try to keep the same.

Tips To Peel Garlic ~
These are tried and tested tips to peel garlic, during festive in my in-law's place we do ginger-garlic paste in large quantity and peel more than 1-2 kgs of garlic at one shot.
1. Soak garlic cloves in water for 30 minutes, garlic will get peeled easily.  Pat dry well peeled garlic before using.
2. In a large plate take enough wheat flour that can cover garlic cloves and rub between palm for 3-4 minutes, lot of garlic will get peeled and other you can peel off easily.  Clean peeled garlic in kitchen towel to remove excess flour.
~ This is my MIL method but I don't do this cause it involve to apply pressure while rubbing garlic & flour plus the garlic ends are little hurtful while rubbing.
3. Take a garlic clove and press it's head (top part) or tail (bottom part) on a flat surface or floor, little skin will out you can easily peel of garlic now.
~ It's one of the most easy method, only thing is some time the garlic pod will break if applied too much of pressure.
4.  Start peeling garlic clove head with a small knife.
~ It's again the easy method which normally I follow.


Hope you find the post and the tips useful.  Have a nice day ~~

Homemade Kitchen King Masala Powder Recipe


Kitchen King Masala is one of my favorite masala powder and it's used in many North Indian recipes.  The flavorful kitchen king adds wonderful aroma and taste to any dish perhaps that's why it's called Kitchen King?  I love badshah brand masala over any other brand but unfortunately it's difficult to get badshah brand masala here unless I am lucky to lay my hands on that and the funny thing is I never got Kitchen King in badshah brand, I mostly end up using Everest.


You may know by now I like to make my own spice powder be it garam masala, garlic powder, ginger powder, dabeli masala or any other thing but I never really thought of making my own kitchen king until recently.  I followed list of ingredients from Everest Kitchen King Masala packet and made my own aromatic kitchen king powder.   You may find list of ingredients long but it's really flavorful and fabulous spice powder to have in your kitchen, if you don't have one or two ingredients you can skip that.  If you can get poppy seeds do add that and have your very own home made kitchen king.


Ingredients for Kitchen King Masala Powder

Cumin Seeds/Jeera  - 1 tbsp
Caraway Seeds/ Shah-Jeera - 1/2 tbsp
Dry Red Chilli/Sukhi Lal Mirch - 8
Turmeric/Haldi - 1 pieces or Turmeric Powder - 1 tsp
Coriander Seeds/Dhaniya - 1 tbsp
Dry Ginger/Saunth/Sukku - 2 pieces [I used  Ginger Powder - 1/2 tbsp]
Black Peppercorns/Kali Mirch - 1/2 tbsp
Cloves/Laung - 8
Whole Yellow Mustard Seeds/Pili Rai - 1/2 tbsp
Green Cardamom/Hari Elachi - 8
Black Cardamom/Badi Elachi - 3
Fenugreek Seeds/Methidana - 2 tsp
Bengal Gram/Channa Dal - 2 tbsp
Fennel Seeds/Saunf - 1 tbsp
Cinnamon/Dalchini - 4 sticks 1" each
Star Anise/Chakri Phool - 1
Nutmeg/Jaiphal - a small pieces or 1/2 tsp grated/powder
Mace/Javitri - 2 small pieces
Poppy Seeds/Khus Khus - 1 tbsp [I didn't use  & not listed in ingredients picture]
Rock Salt/Kala Namak - 1/2 tbsp [Not listed in ingredients picture]


Method:

1. Dry roast all ingredients one by one and allow to cool.
~ Don't have to roast powder like ginger, nutmeg etc if using in powder form.  You can roast all ingredients together too but I never do that.
2. Cool all the ingredients and grind into smooth powder using mixer or coffee/spice grinder.  Sieve powder through a big strainer, grind again if required and discard any large pieces of spice.
Cool powder masala to room temperature and store in air tight container.


Have a nice day ~~

Chettinad Prawn Curry | Chettinad Eral Kuzhambu


Chettinad cuisine is something that if you try once you will be hooked to it provided you eat spicy food. I always liked chettinad recipes but now a days I am too much into it so after Chettinad Egg Curry it's time for some Chettinad Prawn Curry aka Chettinad Eral Khuzambu and also it's a No-Coconut Curry.


This prawn curry is to die for, so flavorful, spicy and delicious.  Perfect with steamed rice; it's the recipe to make your weekend special.  In my home everyone simply loved this prawn kuzhambu and it disappeared in no time.  For me prawn means prawn masala which happens to be the most popular recipe in this blog, I make most of the time for the simple, delicious prawn masala cause it's a fabulous never-fail recipe, many people have tried my Prawn Masala and I always received such amazing feedback, so for a change I tried Chettinad style prawn curry and from then have made this couple of times.  This try and you going to love it.


Ingredients for Chettinad Prawn Curry [Serves 2-3]

Prawn - 300 gms
Onion - 2 Large or 1.5 Cup chopped
Tomato - 1 Large
Green Chilli - 2
Red Chilli Powder - 1 tsp
Coriander Seeds Powder - 1 tsp
Turmeric Powder - 1/2 tsp
Oil - 3 tbsp
Asafetida/Hing - A Pinch
Curry Leaves - 1 Sprig
Mustard Seeds - 1 tsp
Ginger-Garlic Paste - 1/2 tbsp
Tamarind - Small Gooseberry Size
Salt - To Taste
Cilantro - 2 tbsp [Chopped]

To Roast & Grind
Cumin Seeds (Jeera) - 1/2 tsp
Fennel Seeds (Saunf) - 1/2 tsp
Aniseed/Carom Seeds (Ajwain) - 1/2 tsp
Poppy Seed (Khaskas) - 1 tsp [ I didn't use]
Fenugreek Seeds (Methi dana) - 1/4 tsp
Coriander Seeds (Khada Dhaniya) - 1 tsp
Pepper Corn (Kalimrich) -8-9
Dry Red Chilli (Sukhi Lal Mirch) - 2
Cinnamon (Dalchini) -1/2" pieces
Cloves (Lung) - 2
Green Cardamom (Hari Elachi) - 2
Mace ( Javitri) - Small Piece [optional]

To Marinate
Turmeric Powder - 1 tsp
Salt - 2 tsp


Method

1. Clean and rinse prawns 6-7 times in water, add 1/2 tsp turmeric powder and 1 tsp salt, mix well and keep aside for 10 minutes.  Rinse again 3-4 times and mix 1/2 tsp turmeric powder and 1 tsp salt, keep aside until required.

~ This step is to remove smell from prawn, if you wish you can just marinate one time.

2. Soak tamarind in 1/2 cup water for 10-15 minutes and extract pulp.  Finely chop onion, tomato, green chilli.
3. Dry roast all the ingredients under 'to roast & grind' until light brown and fragrant.

4. Allow to cool roasted spices and grind to powder, keep aside.

4. In same wok heat oil, add hing, mustard seeds and allow to splutter.  Add curry leaves, onion, green chilli, ginger-garlic paste and saute until onion becomes soft.
5. Add chilli, turmeric, coriander powders and mix well, cook for a minute.

6. Now add chopped tomato and cook until it gets mash.

7. Add prawn and stir, cook for 3-4 minutes or until prawn becomes soft.

8. Add tamarind extract, 1/2 cup water, salt and bring it to good boil, simmer for 2 minutes.

9.  Add 2 tsp of grinded masala let it boil again and simmer for 5 minutes until gravy becomes thick and oil floats on top. Garnish with cilantro and off flame.

Serve warm with steamed rice or any variety rice of your choice.


Have a  good day ~~

Homemade Mixed Fruit Jam Recipe


Homemade is better any day doesn't matter what ever that may be and homemade jams too fits the bill, we can control sugar quantity, add our choice of fruits and most important we know it has been made in a hygiene environment, not to mention homemade jams taste more delicious than anything for the simple reason that it's fruit of our labour.


I started making jams couple of years back and that's thanks to blogging we intend to try new things.  I have tried all those crazy combination, sugar replacement and what not but among all mix fruit jam is family favorite.  But somehow whenever I make jam I never managed to take pictures, I always think I will do it tomorrow and we all know that tomorrow never comes thus none of my jam appeared in this blog.   I was planing to make jam again for quite some time now but it was not happening until last week I pulled myself and decided complete the task.


I have used fruits available in my pantry you can use any fruit of your choice.  Since I added more of black grapes color of jam is nice dark brown, if you like your jam to be in red/dark pink color then add more of strawberry and less of red grapes.  Don't miss apple and a well ripen banana, while cooking the jam the banana fragrance was mind blowing and it also helps to add sweetness.  Don't worry about the timing, just keep flame in slow and do your other things but remember to stir in intervals, don't keep forget about it totally :) Step-vise pictures are taken from my hand phone, that particular time I couldn't find camera memory card so clicked with hand phone, old habits hardly dies :) so ignore the picture quality, won't you?


Ingredients for Mixed Fruit Jam

Apple - 1
Ripe Banana - 1
Orange - 1
Plum- 3
Sugar Prune - 3
Seedless Black Grapes - 2 Cups
Sugar - 1 1/2 Cups Or More if needed
Lemon Juice - 1/2 tbsp or Citric Acid - 1/4 tsp


Method:

1. Peel, core and chop apple, plum, prune, orange and banana.
2. In a blender or mixer add all the fruits and blend until smooth. [I got 4 cups of puree]

3. Bring the fruit puree to a pan, add sugar, stir and cook in medium to bring it to a boil. Slow flame and simmer until it thickens stirring in regular intervals.
4.  Once jam starts to thickens, add lemon juice/citric acid and mix well.

5. Cook until jam becomes thick  it takes around one and half hour in slow flame, do stir in intervals.
~ My jam is little more on thick, firm side the way I like. You can stop cooking once desire consistency reached, just make sure to cook in slow flame and stir regularly.

Tips to Check if jam is ready ~
1. If you lift your spatula and pour jam, it should flow together and not in drops.
2. Pour few drops of jam in a plate, if it's spreads then it's not ready, if it's stays firm without moving then your jam is ready.

6. Remove from heat, allow to cool slightly and store in sterilize jar.

Isn't it looks gorgeous, nice and glossy?


Variations ~ 
~ You any use any fruit of your choice like pineapple, strawberry, all types of berries, papaya etc
~ Use strawberry more for the dark pink color jam.
~ Increase sugar quantity to suit your taste, for us this itself I find it sweet.


Have a nice day ~~

Sprouts Scrambled Eggs Recipe


I have posted Scrambled Eggs recipe before and in this recipe I just added sprouts to make it more nutritious and also sprouts adds wonderful crunch to these scrambled eggs.  I am trying to include sprouts in many different ways in our diet and this was one such try which now has become a regular recipe.   If you like or want to add sprouts in your diet then you might like this simple and different scrambled eggs with sprouts, it's not really a pretty looking dish but it's differently taste yum.  A quick breakfast option which can be fixed in less than 10 minutes. So leavings you all this with simple recipe and wish you a wonderful weekend.


Other Sprouts Recipes
Homemade Sprouts
Beets & Sprouts Stirfry
Cabbage, Carrot & Sprouts Stirfry
Sprouted Khichdi

Ingredients for Sprouts Scrambled Eggs

Sprouts - 1/2 cup
Eggs - 4
Oil - 1 tbsp
Salt & Pepper - To Taste


Method:

1. Break eggs in a bowl and whisk until fluffy and light.
2. Heat Oil in a pan or wok, add sprouts, stir and cook for 2-3 minutes until sprouts gets almost cooked.
3. Add beaten eggs and cook for 2 minutes in medium flame or until they starts to set.
4. Using a whisk or spatula stir the mixture to break eggs in to pieces.
5. Add salt & pepper mix and cook for another 2 minutes and off flame.

Serve warm with toast, pancake or anything of your choice.


Have a nice day ~~