logo


Aam Ka Achar | Mango Pickle Recipe

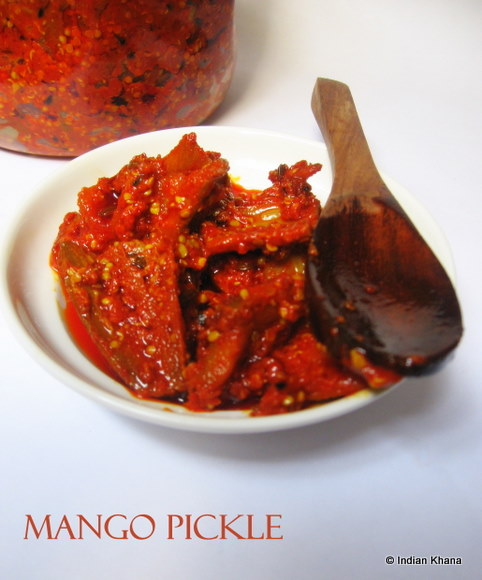
We all love mango pickle don't we?  You don't ...hmm that's bad then this post is not for you.  And of course everyone has their own way of making pickle.  The method I'm posting today is Rajasthani style, a recipe from my sister.  Sis prepared and got this pickle from India, I thought of posting this for my own reference as I love this pickle and always wanted to know the recipe.  This pickle is tangy, spicy and goes well with roti, paratha, puri, khakra, upma, dal-chawal or just with anything. 


Ingredients:

Raw Green Mango - 1 kg [ medium size]
Salt - 4 tbsp
Turmeric Powder - 2 tbsp
Kashmiri Red Chili Powder - 8 tbsp
Saffola/Vegetable Oil - 1/2 kg
Black pepper Corn - 10
Cloves - 4
Yellow Broken Mustard Seeds - 4 tbsp
Salt - 4 tbsp

For tempering:

Fennel Seeds/Saunf-  1tbsp
Nigella/Onion Seeds/Kalonji - 1 tbsp
Asafoetida/Hing - 1 tsp
Oil -  3tbsp

To Grind

Fennel Seeds/Saunf - 2 tbsp
Fenugreek/Methi seeds - 1 tbsp


Method:

Here is all the spices we use.


1. Cut the mango in pieces (like 8-10 pieces of each mango), wash and dry in Sun for 30 minutes.
~ The mango pieces should be dry, if not pat dry with cloth.

2. Mix 2 tbsp salt and turmeric with mango pieces and keep side 4 hours.

3.  Heat 1/2 kg oil until it's about to boil and keep aside for it cool completely.

4. Grind coarse fennel and fenugreek seeds separately (from the 'for grind' ingredients) and mix with red chili powder, mango pieces and keep aside.

5. Meanwhile in a small pan or wok heat oil and add all tempering ingredients, saute for a minute and pour on mango mixture.

6.  Now add cloves, pepper corn, yellow mustard seeds, salt and mix well for all the mango pieces to get coated with spices.

7. Add the heated oil (which should be on room temperature now) to mango, spice mixture stir well and keep it in Sun for a day.

8. Next day put pickle in a sterilized and dry glass bottle or pickle jar and store.


Now the pickle is ready to consume and it stays for a year if kept properly.


Note:
~ Always make sure oil floats on top, press down the mango pieces with a dry spoon.
~ Always use clean n dry spoon.
~ It's better to keep small pickle jar separately for daily use to avoid touching the pickles every day. 
~ Once in a while place the jar/bottle in Sun.
~ One can tie a muslin cloth on jar/bottle mouth this way the pickle gets air and remains fresh.
~ The red chili powder used in this pickle is important to have that nice red color, make sure you use good quality chili powder. 


aam ka achar recipe,how to make aam ka achar,mango pickle recipe,mango pickle north indian style,aam ka achar Rajasthani style,marwari style aam ka achar,


Kiwi Cooler

Now a days I don't feel like cooking much thanks to this weather and look for more drinks.  DH got some kiwi I started to wonder what to do with these ...of course we can eat the fruit as it is but the blogger in us make us do lot of other things :) ...finally I end up myself with this drink.  This cooler is very refreshing, tangy and sweet, just perfect to sip and relax on a lazy afternoon which I did by the way or a quick drink to wow your guests.  This can be made in less than 5 minutes if you don't spend much time mashing the kiwi, and if the kiwi is ripe then it's very easy.  And for this reason it's going to be keeper Kiwi recipe for me. 


Serves - 2
Ingredients:
Recipe Source: Tarladalal

Kiwi - 2 ripe
Lemon Juice - 2 tbsp
Sugar Syrup - 2 tbsp or to taste
Soda Water -  330ml [chilled]
Crushed Ice - 1/2 Cup
Ice Cubes - few
Kiwi Slices - 2 for garnishing 


Method:

1. Scoop out the kiwi and mash it well.  Or peel the skin and mash the kiwi fruit.


2. In a tall glass add 1/4 cup of crushed ice, 3 tbsp of mashed kiwi, 1 tbsp of lemon juice, 1 tbsp of sugar syrup and give a stir.


3. Add half of soda water and few ice cubes.  Garnish with kiwi slice.  Repeat the same for another glass.


Enjoy the summer cooler or please your guest. 


Have a nice day ~~

Eggless Chocolate Cookies


I'm not really a chocolate fan, that doesn't mean I don't eat chocolate at all, so stop giving me that look now :) .  I baked these cookies for my nephew, though I wanted to make a chocolate chip cookie but in the end it just happened to be a chocolate cookie.  The fun part was I let my nephew shape and design the cookies so you can see all those cute, funny pattern on cookies which he had lot of fun doing it.  All together a day well spent baking and eating.  The cookie was just how it suppose to be little crunchy, little chewy and little soft, exactly how I wanted it to be.  It's very simple recipe with few ingredients which I adapted from  Hamaree Rasoi and did little change to make it eggless. Thanks to Deepa for the recipe :)


Makes 2 dozen cookies
Ingredients:

All Purpose Flour - 1 1/2 Cup
Powder Sugar - 3/4 Cup
Cocoa Powder - 3 tbsp
Butter - 1/4 Cup  [at room temperature]
Yogurt - 1/4 Cup 
Baking Powder - 1 tsp
Vanilla Essence - 1/2 tsp


Method:

1.  In a bowl whisk yogurt, sugar and butter until fluffy.  Preheat oven to 180C or 356F
[If using unsalted butter add 1/4 tsp salt]

2. Sieve flour, baking and cocoa powder together and fold into sugar, yogurt mixture in batches making sure there are no lumps.  Add vanilla essence and whisk together well.  

3. Wrap the dough in cling and refrigerate for 1 hour. After an hour take out the dough and divide in to equal portion.  Makes small balls and press between palm or use a cookie cutter for any desire shape.  Place them on cookie sheet about an inch apart from each other.  

4.  Bake the cookies for 10-12 minutes.  Mine was done in 10 minutes so keep an eye. Cool on a wire rack. 

Enjoy the cookies.  


Note:
1. You can add egg instead of yogurt.
2. Add chocolate chip topping if you wish.


Have a good week ~~

Semiya Upma

I like semiya upma very much, it's easy and simple to make and makes a delicious breakfast or dinner.  I mostly do this for a quick and hassle free dinner during week days though DH doesn't really like any kinda of upma :(  The best thing about semiya upma is one can do lot of variations with it and enjoy as a meal, here am presenting one of the most simple version which can be done in less than 15 minutes.  


Serves ~ 2
Ingredients:

Semiya/vermicelli - 1 Cup
Onion - 1 medium
Green Chillies - 2
Curry leaves - 1 sprig
Cashews - 8-10
Channa Dal - 1 tsp
Cumin Seeds - 1/2 tsp
Salt - to taste
Oil - 1 tbsp
Water - 2 cups


Method:

 1.  Heat a wok or pan add 1 tsp of oil and roast semiya until golden brown in medium flame.   Keep a eye on it to avoid it from burning, transfer the roasted semiya in a plate and keep aside.

2.  Cut onion lengthwise and slit the Chillies .

3. In the same pan heat remaining oil add cumin seeds and let them crack.  Add channa dal and roast until golden brown now add onion and green Chillies , curry leaves and sauté  until pink.  

4. Add cashews and sauté  for a minute, now add water, salt.  Once the water starts boiling add roasted semiya slowly and mix well.  Cook in low flame until all the water evaporates or semiya is cooked. 

Delicious semiya is ready, have with any chutney or sauce.   I like mine with tomato sauce :)


Have a nice day ~~


Vegetable Momos | Steamed Vegetable Dumplings

Momos are quite famous more in North/North-East compare to South India and mostly wrongly presumed as Indo-Chinese food where it's actually native from Tibet and Nepal. 

First time I had Momos was in Delhi and immediately liked it, though I have tried the same in Singapore at few Indo-Chinese restaurants but it was so-so.  Momos can be either steamed or fried, fried momos called 'Khotey Momos'. It taste wonderful if served steaming hot with sauce, it actually very easy to make except the flour rolling part, that's the only tedious job I find but neither the less the end result makes up for all the hard work :)


Ingredients:

Makes - 20 medium size momos

For outer layer
Maida/APF - 1 1/2 cups
Sesame Oil - 1 tsp
Salt - 1/2 tsp
Water 

For Filling 
Cabbage - 1/4 cup finely chopped
Carrot - 1/4 cup finely chopped
Beans - 1/4 cup finely chopped
Paneer - 2 tbsp shredded 
Onion - 1 finely chopped
Green Chilies - 2
Garlic & Ginger - 1 tbsp finely chopped
Freshly Grounded Pepper - 1 tsp
Light Soya Sauce - 1 tsp
Sesame Oil - 2 tbsp
Salt - to taste
Spring Onion - 2tbsp divided [ I didn't use]


Method:

 1. In a bowl mix all the ingredients for outer layer, add water in small quantities and make smooth pliable dough.  Cover with damp cloth and keep aside for 15 minutes or until we are ready to use it for filling.

2. To make the filling heat a wok or pan, add 1 tsp of oil, chopped ginger-garlic and green chilies sauté until light brown.

3. Add chopped onion and fry until light pink, add carrot, beans and stir for a minute.  


4. Now add cabbage and mix well, cook for 2 minutes in high flame.

5. Add paneer, salt, pepper, soya sauce and stir for a minute. 
~ Add less salt and soya sauce contains salt too.


6. Off the flame, the veggie should be crunchy and  not  over cooked.  Add 1 tbsp of chopped spring onion and let the filling come to room temperate.
*My paneer had little extra moisture, make sure yours is dry.


7. Till we wait for the filling to cool down, take lemon size pinch from the dough and roll in to thin roti.  Always keep rest of the dough covered with damp cloth.

8.  Use a cookie cutter, or any steal bowl, cap and cut into rounds puri.  The size depends on how big you want your momos to be.


9. Add 1 tbsp of filling each disc and bring the sides together in the center, pinching firmly together, pinch out extra dough OR make a half moon and pinch the edges.  


I simply bring the edges together as it was faster compare to doing the half moon.  

10. Heat water in steamer or idly maker.  If using idly cooker then brush the plates with little oil and place momos on them, do not over lay but give lot of space in between.  Brush all the momos with sesame oil and steam for 8 to 10 minutes or until it gets cooked.

Garnish with remaining spring onion and serve hot/warm with any sauce of your choice.  I made soya sauce dipping and also used plum sauce.  


For Soya Sauce Dipping

Light Soya Sauce - 3 tbsp
Water - 2 tbsp
Green Chilies - 2 finely chopped (I used green n red chili)

Mix all the ingredients and serve.

Enjoy the hot steaming momos.


 Note:

~ Use minced chicken instead of vegetables for a chicken momos.
~ You can deep fry the momos.


And this goes to Chinese Cuisine event by Radhika.


Have a nice day ...

Cucumber and Mango Raitha


I wanted to make a raitha with Bisi Bela Bath and decide for cucumber raitha but then I change my made and wanted to add a twist with raw mango.  It turn out to be too good, tangy, refreshing and so simple to make just perfect for this summer.  


Ingredients:

Cucumber - 1/2 Cup grated
Raw Mango - 1/4 Cup grated
Green Chiles - 2
Fresh Curd/Yoghurt -2 Cups
Fresh Cumin Powder - 1/4 tsp
Salt - to taste


Method:

1. Wash, peel and grate cucumber and raw mango, finely chop green chilies.

2. In a bowl add cucumber, mango, green chilies, salt and curd.


3. Mix everything well and add cumin powder, mix again. 


Serve chill and garnish with cumin powder.  Goes well with any paratha, variety rice, we had it with Bisi Bela Bath


Notes:

~ You can add cilantro for garnishing.  
~ You can also sprinkle little of red chili powder for that extra touch to the raitha.

Enjoy your day ~~

Eggplant and Potato in Oil Gravy | Ennai Karthirikkai Kuzhambu


I didn't knew there is anything call Ennai karthirikkai Kuzhambu until one day I tasted it from my colleague's lunch box and the poor him felt the aftermath of it as I bugged him each n every day to get the recipe, finally I got the recipe and tried with my add modification to it.  The end result was better than I expected.  Normally baby eggplants are used in this recipe but I used long ones and also add a potato.    I'm blogging this for my own reference. 


Ingredients:

Eggplant - 2 Cups chopped
Potato - 1 Medium
Onion - 1 Medium
Tomato - 1Medium
Green Chilies - 2
Tamarind - marble size
Red Chili Powder - 1 tsp
Coriander Powder - 1 tsp
Turmeric Powder - 1/2 tsp
Fresh grounded Pepper - 1/2 tsp
Mustard Seeds - 1/2 tsp
Sesame Oil - 3 tbsp
Salt - to taste
Water - 2 cups
Cilantro - 2tbsp chopped
Curry Leaves - 1 sprig

For Spice Powder
Toor Dal - 1 tbsp
Channa Dal - 1/2 tbsp
Urad Dal - 1/2 tbsp
Fenugreek/Methi Seeds - 1 tsp
Cumin Seeds - 1 tsp
Dry Red Chilies - 2


Method:

1. In a pan heat 1 tsp of oil and roast all the dals and methi, cumin seeds until golden brown.  Allow to cool and grind to fine powder ( I made it little coarse)

2.  Chop eggplant & potato in bite size pieces and mix with spice powder.  


3. Chop onion and slit the chilies.  Puree the tomato and keep aside.  Soak tamarind in little hot water for 10-15 minutes and extract thick pulp.

4. In a pan heat 2tbsp oil add mustard seeds and let it crack.  Add onion and chiles and saute until onion becomes pink. 

5. Add eggplant and potato and saute for 3-4 minutes in slow-medium heat.  


6. Add all masala, pepper powders mix well,  now add puree tomato and cook until oil  starts to separates or for 2-3 minutes. 

7.  Add 1-2 cup of water, salt and boil until potato gets cooked for around 5-6 minutes in medium heat. Add tamarind paste and simmer for 2 minutes.


8. Add 1tbsp of oil simmer again for a minute off the flame and garnish with chopped cilantro and curry leaves. 


Let the curry sit for 5 minutes before you dig in, enjoy with hot steamed rice or for a change try with Idly ..it goes so well with idly too.


Eggless Banana Cake | 200th Post

How you guys doing? I know I had kinda unexpected break due to various reason which we should not focus on.  I'm so glad to say this is my 200th blog post and it took me almost 3 years ...infact just 1 one more month and it will be 3 years of blogging.  And as the norm goes everything celebrated with sweet/dessert so how can I miss this occasion?  I had some plan for 200th post but then I settle myself with simple banana cake. 


The cake is so good you have to try this.  In a week's time I already made this cake 4 times, yes it's that good, easy and super hit with everyone at my place.   This makes a perfect tea time cake, very soft, dense and delicious.  

Ingredients:

Plain Flour - 1 Cup
Granular Sugar - 3/4 cup [1 cup if using caster sugar]
Ripe Banana - 1 Cup mashed [I used 2 long bananas]
Cooking Oil - 1/2 Cup
Fresh Curd/Yogurt - 1/4 Cup [ OR 1 egg]
Fresh Milk - 1/2 Cup
Walnut - 1/4 cup chopped
Baking Soda - 1/4 tsp
Baking Powder - 1 tsp
Salt - a pinch


Method:

1. Peel and mash bananas with a pinch of salt, chop walnut and keep aside.

2. In a bowl beat sugar with yoghurt until fluffy.  Add mashed banana and mix well until thick.


3. Add milk and beat well, fold flour in small quantities with baking soda & powder and combine everything well.


4. Add oil and mix well until oil blends with mixture.  Lastly add walnut and mix it.


5. Pour the mixture in a greased tin and bake at 200C for 20-25 minutes or until a toothpick comes clean, mine was done in 20 minutes.


Cool on a wire rack and cut in desire shape.  Every time this cake comes so well, I have used bread tin, round cake tin, square cake tin to bake this cake.  


Well the uneven shape is cause I cut the cake before it cool completely, so you let the cook gets cool and enjoy the delicious yet easy banana cake. 


Have a good day ~~~