logo


Beets Pesto Braided Bread

Pesto braided bread recipe
This is what I done with my left over beetroot pesto – Braided Bread, perfect for breakfast or evening snack as it’s light compare to stuffed braided bread.  If I have leftover pesto I always want to make braided bread, I did same with my leftover spinach pesto but that time I couldn’t take pictures.  You can use any stuffing of your choice instead of pesto that’s the beauty of stuffed bread. 
braided bread with beetroot beets pesto recipe
For bread recipe I follow almost same as my wheat bread with garlic & herbs recipe cause that’s recipe always works well for me.  I wanted to take stepwise pictures which I did but half way it started to rain left me with no light, on a good sunny day I struggle with light then let’s not talk about a dark rainy day !  But then it’s quite easy as most of know how to braid hair Smile   It goes so well with a cup of coffee and tea for that quick breakfast (of course provided you made this previous day), don’t you think it’s perfect to venture during May Day’s holiday? 
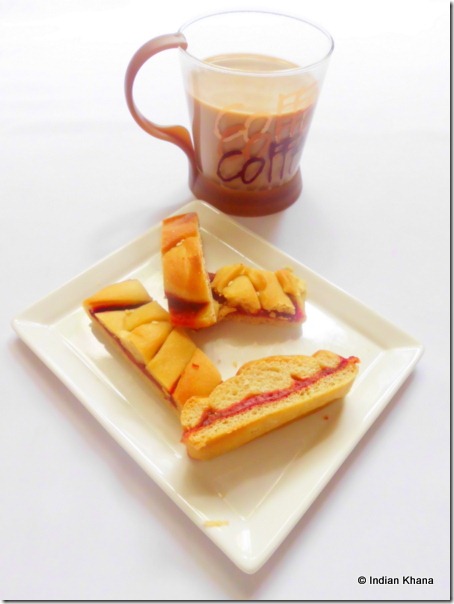
beets pesto bread braided recipe
Ingredients: [ Makes 2 medium size loafs]
For Beetroot (Beets) Pesto here recipe here.
For bread
Whole Wheat Flour – 1 Cup
Plain Flour – 1 Cup
Garlic Powder – 1 tsp [optional]
Active Dry Yeast – 1 1/2 tsp
Milk – 1/2 Cup
Water – 1/2 Cup
Sugar – 2 tsp
Extra Virgin Olive Oil – 2 tbsp [divided]
Sesame Seeds – 1/2 tsp [optional]
Melted Butter – 2 tsp

beetroot pesto braided bread recipe
Method:
1. Heat water and milk until luke warm or microwave for 30 seconds.  Add sugar, yeast stir to mix everything well and keep it aside for 10-15mins until it gets frothy.  Add 1 tbsp of olive oil in frothy yeast mix and stir well.
2.  In a wide bowl add both flours, garlic powder and whisk to mix.
3. Add yeast mixture to flour in small quantity and start kneading.  Keep adding yeast as required until it forms smooth dough, it will take 7-8 minutes. 
4. Place dough on a clean surface or worktop, add 1/2 tbsp of olive oil and knead dough again for 5-7 minutes.  Keep the dough back in greased bowl, coat dough well with oil and cover with a damp cloth or cling and keep it side until it double in size for 1 1/2 to 2 hours.
5. Knead again for 4-5 minutes to remove all air bubbles and divided dough into two portions.
6. On a slight floured surface roll dough in rectangle with 1cm thickness, keep another piece of dough covered.
7. Dab 3 tbsp of beets pesto in centre of dough (about leaving 1 to 1.5 inch on all sides).
8. Now we have to make braid, using a sharp knife make inclined cuts of about 1inch in both sides making sure we have equal numbers of strips both sides.
9. Fold top and bottom dough part towards pesto and start braiding by folding strips over pesto and lapping alternately      [Begin on left, place 1st strip over pesto diagonally, then take right strip and place over pesto diagonally too, repeat same for all strips]
10. Line a baking tray with foil and keep prepared loaf.  Repeat step 8 and 9 for another piece of dough.
11. Cover tray with cling and keep aside for 30 minutes for 2nd rise.
12. Preheat oven to 200C and brush both loaf well with butter, sprinkle sesame seeds on top if preferred.
13. Bake for 20-25 minutes or until golden brown, keep a eye after 20 minutes.  Remove tray from oven and brush loaf again with butter.  Cool loaf on wire rack.
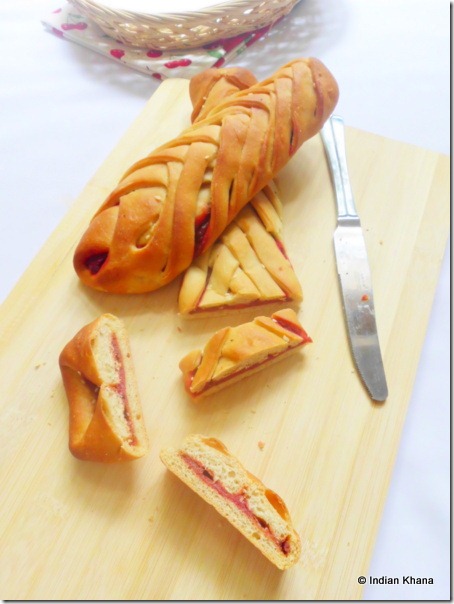
Braided bread with pesto recipe
Enjoy with a cuppa.
Pesto with beets braided bread
Variations
~ You can use 2 cups of plain flour instead of adding wheat flour.
~ Your yeast should be fresh, if it didn’t frothy then repeat same step. 
~ Pesto filling quantity can be more or less.
~ Try same with basil or spinach pesto
~ Instead of butter, you can brush loaf with milk or eggwash.
~ Bread stays good to 3 days if refrigerated.  Mine was finished by next day.
Have a nice day.

Papaya Smoothie

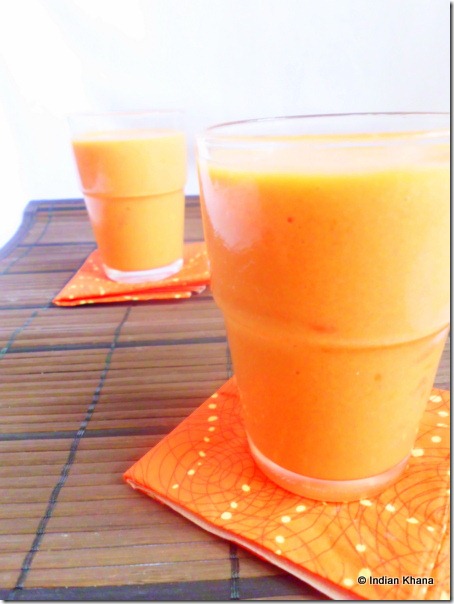
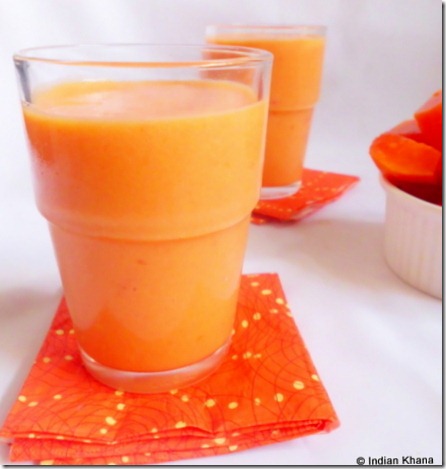
Easy papaya smoothie recipe
I am sure all of us looking for easy summer drink to ourselves hydrated and this is one such simple summer drink recipe which we can prepare in jiffy and it’s also very filling.  I like drinks which are easy and quick without much of frills and this suits my bill so perfectly.    I know few of you might be waiting for my recipe of what I did with left over beets pesto and I wanted to post the same but I am very tired and have no energy to write a post so thought of posting this quick and simple  one.

Ingredients: [ Serving 2]

Ripe Chopped Papaya – 1 1/2 cups
Buttermilk – 3/4 cup
Honey/Sugar – to taste
Lemon Juice – 1/2 tbsp
Ice Cubes – 5-6
CIMG2043

Method:
1. Put all ingredients in a blender or mixer and blend until smooth.  Pour in serving glass and serve.  Add chopped papaya pieces as garnish if preferred.

Simple right?

papaya smoothie easy summer drink
Variations:
1. Instead of buttermilk, you can use milk and make it as milkshake.  Don’t use lemon in this case.
2. Adjust lemon and sugar/honey according to your taste. 
3. You can also add 1/2 cup of any fruit nectar for extra zing.
Have a nice day ~~

Home made Garlic Powder | How to make Garlic Powder


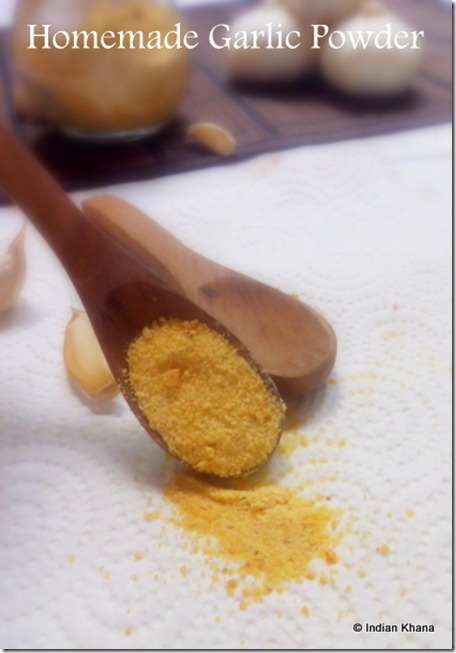
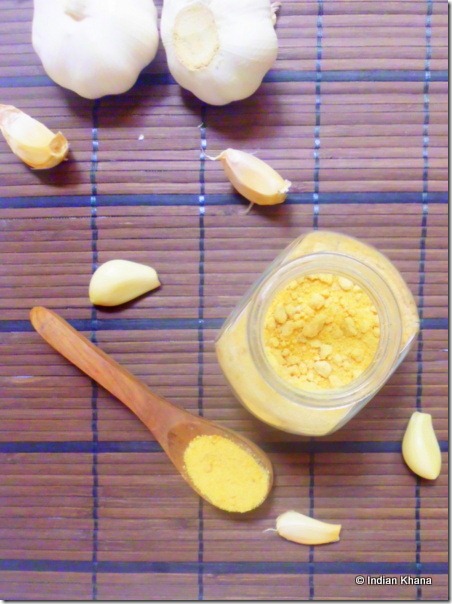
Homemade garlic powder
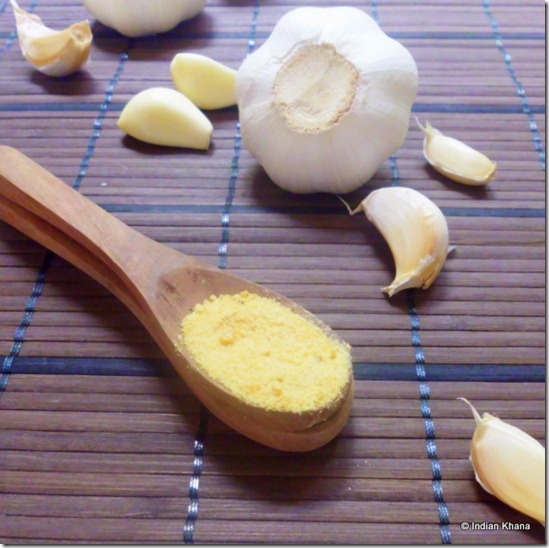
I like to use garlic powder in savoury baking plus now in my everyday cooking just cause I love garlic.  So I wanted to make my very own garlic powder at home some time back like couple of years ago, but I  found it’s required lot effort or a dehydrator to make a good garlic powder !  After I while I gave on the idea and totally forgotten about it until My sister-in-law made garlic powder at home without any special gadgets and when I saw the garlic powder it’s texture was exactly like any readymade garlic powder with much more stronger smell.  I immediately ask my SIL how she did it only to realised how obvious it was, proving making garlic powder at home is so easy and anyone can do it. 
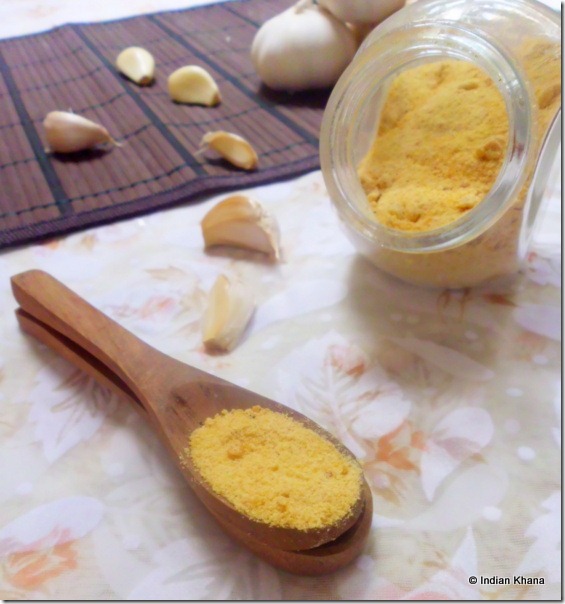
Garlic powder recipe home made
When I did post on how to make almond flour I never thought it will become one of the popular post of this blog with numerous feedback from readers, it’s good to know simple things does help some one and with same motivation doing this post on how to make garlic powder at home.  If you think procedure it’s long then let that put you off it’s quite easy.  There’s nothing like fresh home made garlic powder and not to mention money we can save.  
Tutorial on homemade garlic powder recipe
How To Make Garlic Powder
Ingredients:
Garlic Pods – 1 Cup [ or use as much as you like]
Method:
1. Peel garlic and dry under sun for 2 days.  [You can slice garlic pods if having large pods like in this post pictures]
2. Grind peeled and dried garlic in a mixer, food processor or coffee grinder and pulse for 2-3 minutes until it become smooth paste.  Every time don’t pulse more than 30 seconds.
~ Don’t panic if you see garlic has become paste instead of powder, we have little more work to make paste into powder.
3. Take a plastic sheet or clean thin cotton cloth and spread garlic spread in very thin layer(spread garlic paste over plastic sheet or cloth evenly), dry under sun for 4-5 days.   Garlic paste will be become like thin crackers/pieces and it will come out of sheet or cloth easily.
~ If you break and crush between fingers garlic dried pieces (crackers) will become powder.  If you feel it’s still little wet or forming lumps instead of powder then you have to dry for 1-2 days again.  Repeat the test until you get powder consistency.
4. Collect all dried garlic pieces and pulse again for 1-2 minutes in a dry mixer or food processor this time not more than 15 seconds for each pulse.  You will get your very own garlic powder.
5. Spread powder on a sheet/cloth or paper and dry under sun for 1hour, don’t dry long if not powder will start to form lumps. 
~ We dry one last time for 1 hour to remove any moisture from grinding. 
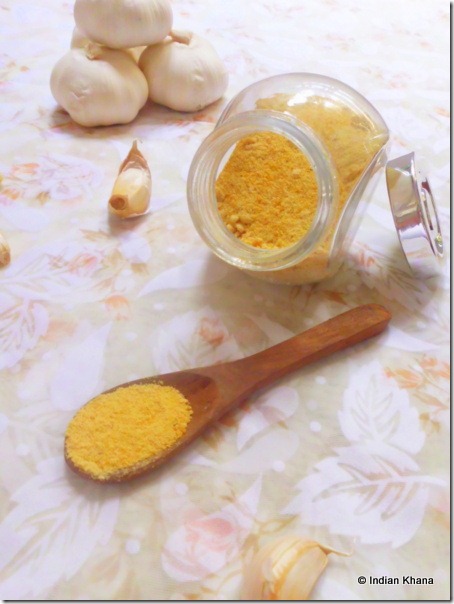
6. Store in air tight jar/container.
Note:
1. Instead of sun drying you can dry peeled garlic in oven.  Preheat oven to 150degree and toast garlic pieces until it completely dry, stir in regular intervals.  After it cools down grind into powder and do step 5.
Easy homemade garlic powder recipe garlic recipe
How to Store Garlic Powder
Now this is important, when I used to buy garlic powder I realized very soon that if kept at room temperature it’s forms lumps very quickly and I started to keep my garlic powder pack in fridge and use as and when required or keep outside only a small amount.
So here we have to do same thing, keep your garlic powder jar/container in fridge and use as required.  Or keep small quantity outside for daily use. 
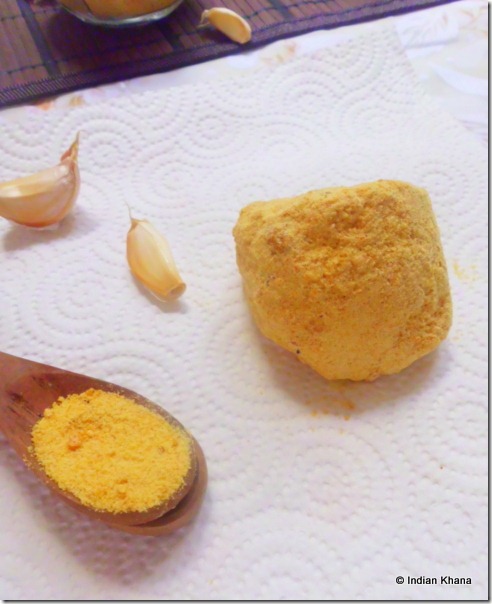
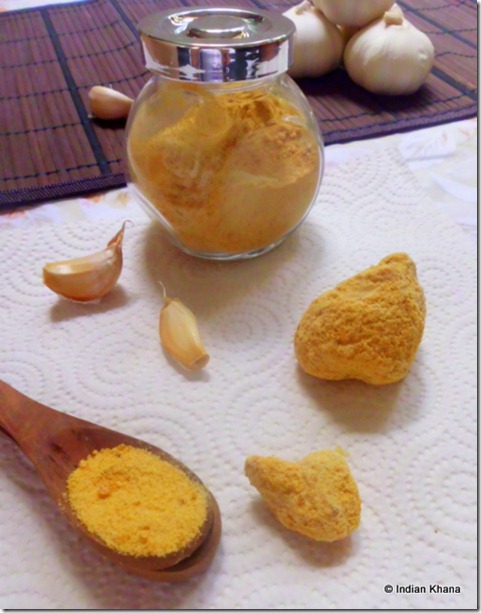
Now, if you keep garlic powder in fridge it will still be forming lumps like you can see in below picture, this huge piece is of garlic powder kept inside fridge.
Home made garlic powder recipe
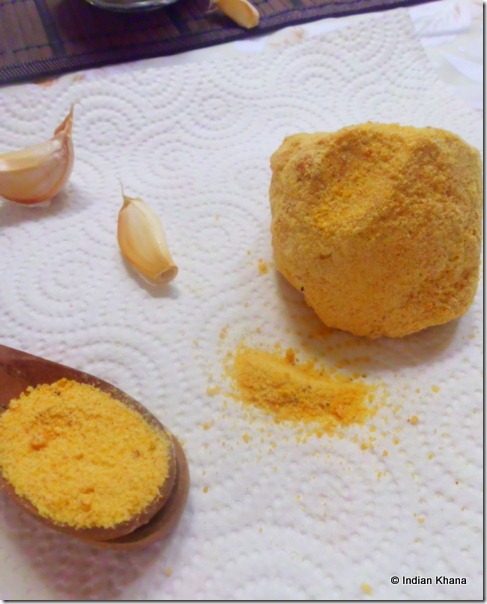
If I press with finger with no pressure it’s easily becomes powder again, you can see in below picture a small dent and powder beneath it.  That’s the portion I pressed with my finger and it started to crumble in powder.  For this size of pieces I generally press it down with back of ladle or spoon.
How to make Garlic powder at home
So far so good?  But if you notice below picture carefully these pieces of garlic powder is not easy to break as above because it got moisture and formed lumps.  If I press again with my fingers it won’t become powder but it will be little  sticky.  Here again I use spoon to break this lumps in small pieces and then to press those small pieces to make it powder.  Every time we may not get powder but tiny pieces due to moistures so just use it those pieces in your normal cooking. 
Easy garlic powder home made recipe
Few pointers to keep garlic powder intact for long time (easily for 6 months)
1. Use clean, DRY,  air light container/jar to store garlic powder
2. Every time use clean and dry spoon. [Never use hand  and touch garlic powder]
3. Immediately close jar again after taking our required quantity.
4. Store in refrigerator.
5. If making in large batch say for 1kg or 2kg of garlic, for daily use store small quantity in small bottle or jar and remaining in another large bottle.  Store both jars in fridge.
how to make garlic powder recipe
I hope you find this post useful, if any doubts do ask me.
Have a nice day ~~

Fish Fry | Meen Varuval

Fish Fry Recipe Indian Style
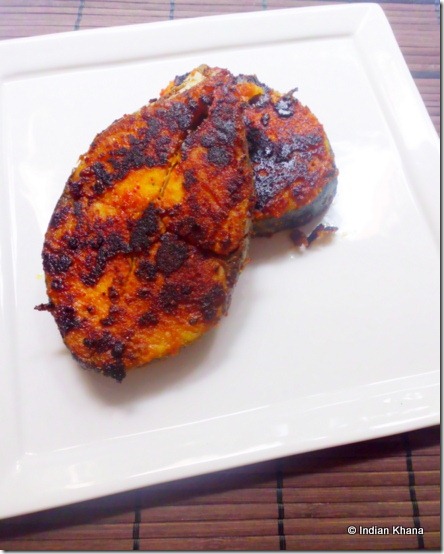
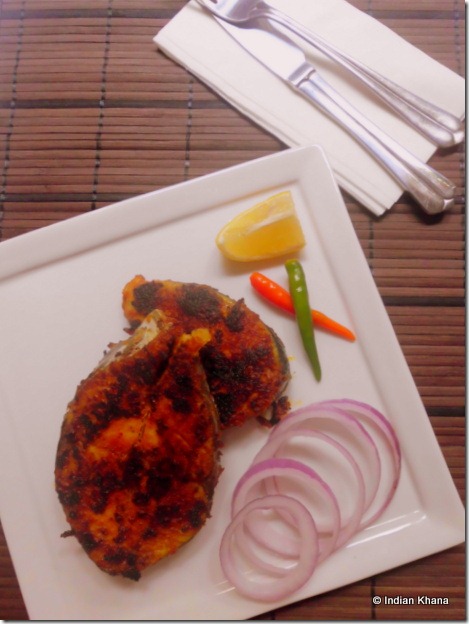
I wanted to try making fish for long and now that has happen.  Prepared this simple and most easy fish fry recipe for DH and settle myself with aloo gobi sabzi.    This must be the most healthy version of fish fry compare to the deep fried version, of course we call this recipe fry which literally doesn’t translate to deep fry here! 
Indian Style Fish Fry Recipe
So coming back to our recipe I tried it hoping DH will like it and he did, though he wanted me to grill it in oven but he was happy with the end result of this recipe.  You can use any fish variety though personally I like to use mackerele or vanjiram meen. The bottom line is I am happy that I venture out with fish recipes and hope to continue doing so. 
Fish Fry Recipe
Ingredients: [Serves – 2]
Fish - 2 pieces/300gm ( I used Seer Fish/ King Mackerel/Vanjiram variety]
Red Chilli Powder – 1 tsp [ use less if you don’t like spicy]
Coriander Seeds Powder – 1/2 tsp
Turmeric Powder – 1 tsp [divided]
Ginger-Garlic Paste – 1 tsp
Lemon Juice – 2 tsp
Oil – For pan fry
Salt – to taste
Fish masala recipe shallow fry
Method:
1. Clean fish and wash 2-3 times in running water.  Mix 1/2 tsp turmeric powder and 1/2 salt and rub over fish, let it sit for 10-15 minutes and then wash fish again 2-3 times in running water; this is to remove fish smell.
2. In a wide bowl or plate mix  all spice powder, lemon juice, ginger-garlic paste, salt, add 1 tbsp water if required.    Coat masala on both side of fish nicely and let it marinate for 30 minutes or more.
3. Heat a pan or tawa, drizzle oil and pan fry fish until both side turns dark brown and fish is cooked.
Pan fry fish with indian spices recipe
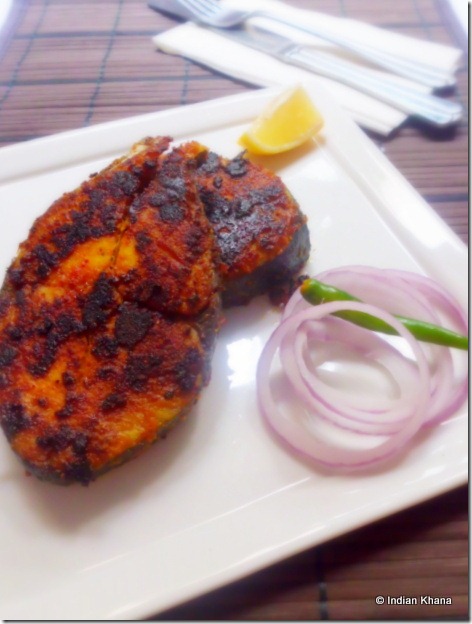
Our fish fry is ready, serve with lemon wedges and onion for that extra kick.
Variations:
1. Instead of turmeric, red chilli and coriander powders you can use 1tsp sambar or curry powder.
2. You can also deep fry marinated fish instead of pan fry.
Have a nice day ~~

Fuseli with Roasted Beetroot Pesto

Roasted Beets beetroot pesto recipe
If you follow my blog by now you must know how much I love beets (beetroot), thus having quite a decent variety of beetroot recipes here and the best thing – ‘ I am not a beetroot fan’ DH also likes beets now and brings it without fail on his every trip to Little India.  Always I will make beetroot dal of one beetroot and another one either beets masala or experiment recipe. This time I wanted to try something new and end up making beetroot pesto.
Fuseli pasta with roasted beets pesto recipe
  This pesto was actually better than I thought, roasted beetroot flavour is amazing and lemon adds the extra zing plus helps to reduce beets sweetness. Cashew bring creamy texture to pesto as you can see in the pictures, I didn’t add cheese in pesto just used a little for garnishing.   Beets pesto can be serve along pasta or use as dip or as a spread over bread, making it a beautiful versatile recipe.  If you like me or want to try something different and interesting with beetroot then you have to try this ..oh ya it does taste just so wonderful. 
Roasted beetroot pesto recipe

Ingredients: [Serves 4-5]
For Beetroot Pesto
Beetroot – 1 (around 300gms)
Cashew nuts – 1/2 cup
Chopped Garlic – 1/2 tbsp
Olive Oil – 1/4 cup [I used extra virgin]
Lemon Juice - 2 tbsp [divided]
Parmesan Cheese – 3 tbsp + for garnishing
Salt & Pepper – To taste
Water – 2-3 tbsp [if required]
For Pasta [ for 2 person]
Fuseli – 2 cups [ or use any variety of pasta]
Salt – 1/2 tsp
Oil – 1 tsp
Water – To boil pasta
Beetroot Recipes Pasta Pesto
Method:
To make Pesto
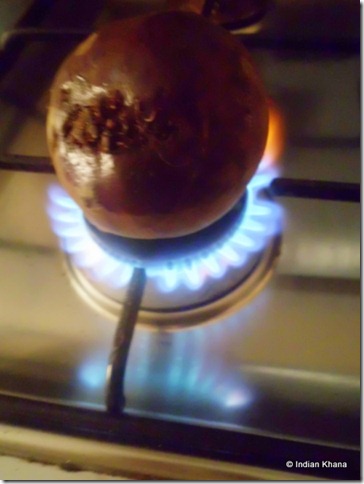
1. Wash and roast beetroot over on stove top or boil it.
Roasting beets on stove top pesto
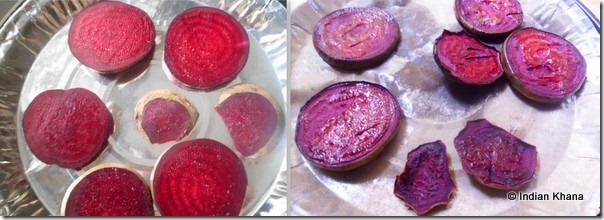
Or you can roast beets on oven.  If roasting in oven, slice beetroot, brush slices with oil and roast in 200C preheated oven for 30-40 minutes or until beets gets cooked, turn beets slice in 10 minutes interval so it’s gets cooked properly.
Roasting beets in oven for pesto
~ If you roast whole beets it will take around 1hour+ to cook.
2. Take beets out of oven and let it cool, when it’s cool enough to handle peel skin and chop beets. [If your beetroot is cooked properly the skin will come out easily]
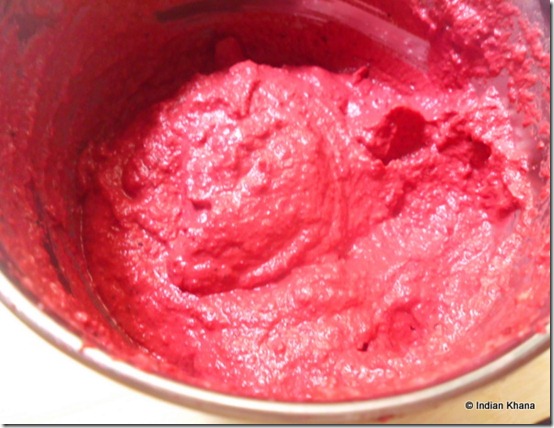
4. Add chopped beets and all other ingredients (reserve 1 tbsp lemon juice)  in a mixer or blender & pulse into smooth paste/pesto.  Add 2-3 tbsp of water if required to pulse into smooth pesto.  [ I added 2 tbsp water]. 
Looks how creamy and beautiful it looks, I just loved it
Beets pesto recipe
And our pesto is ready to use.
Roasted beets beetroot pesto recipe (2)
To cook Pasta
4.  Bring a large pot/pan half filled with water to boil, add salt, oil & pasta and cook as per instruction in pack or around 10-12 minutes in medium flame until al dente (cooked and tender to tooth).
5. Drain pasta and reserve 1/2 cup to 1 cup of water, rinse pasta under tap water, toss and keep aside.
For Assembly
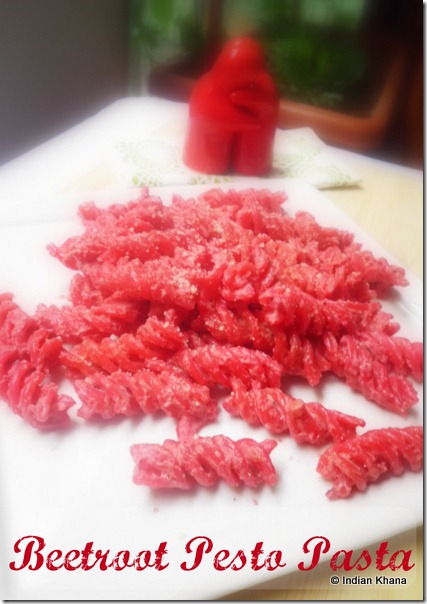
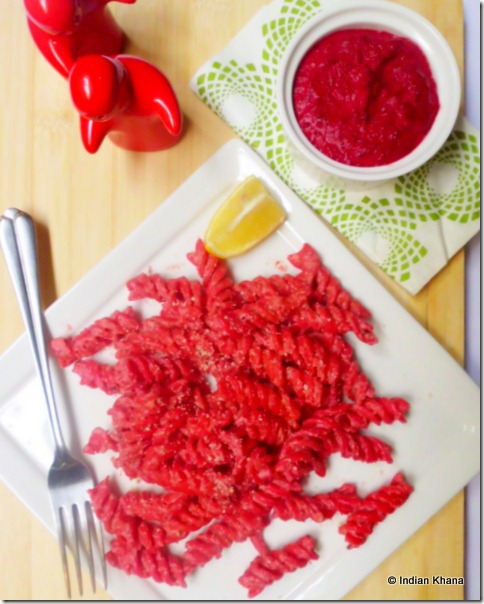
You can place cooked pasta on a plate and add pesto on top, sprinkle little parmesan cheese on top.
Pasta with beets pesto recipe
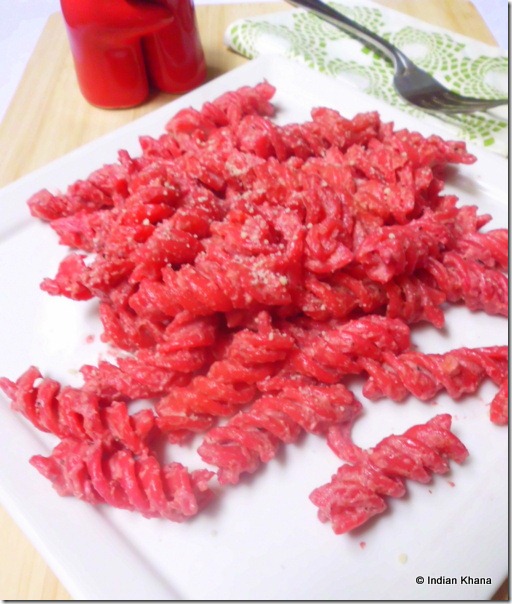
OR add reserve water and pesto in pan, bring it boil, add cooked pasta, mix everything well.  Add reserve 1 tbsp lemon juice and off flame. garnish with cheese.  Let the pasta sit for 10 minutes before you dig in.
Fuseli with beets pesto recipe Pasta Recipes
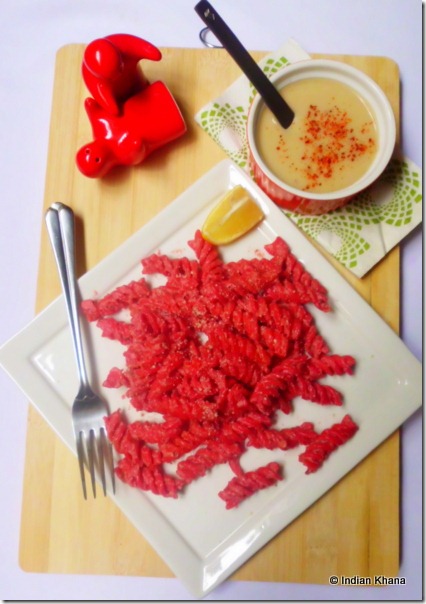
Have it with salad or soup to make it a filling meal.  You can serve this pasta along lemon wedge if anyone want to reduce beetroot sweetness.
Roasted beetroot pesto fuseli pasta and soup recipe
Pesto stay good for 2 day if refrigerated.  And to know what I did with my leftover pesto, stay tune..I have something interesting to share Smile
Have a nice day ~~

Baigan Bharta | Smoked Aubergine Chutney

Baigan Bharta Recipe smoked eggplant  chutney
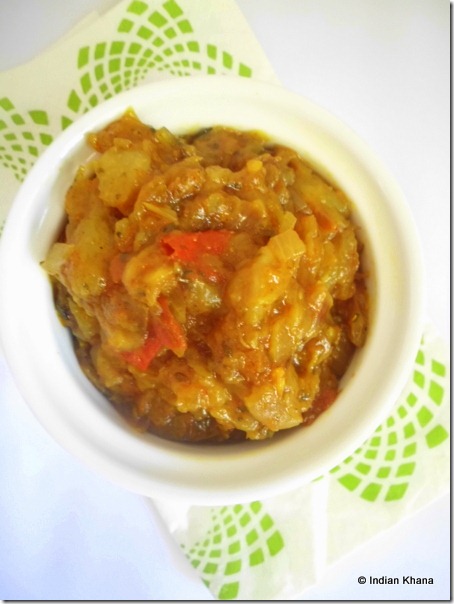
I love baigan/baingan bharta and successfully converted DH to love this wonderful dish too thus I make this more than once a month.  This simple bharta goes well with roti, paratha, rice or even with idly, dosa but I love it with baati.   I have blogged here before baigan aloo bharata, though the recipe is almost similar but I had few pending request to blog to baigan bharta in specific and this time I thought of doing it, I wouldn’t take step vise picture but if you can refer to my baigan aloo bharta post for stepwise pictures.  You can also boil and make this bharta, @ my in-law place it prepared this way and it’s also knows as bhaata chutney but personally I liked only when the eggplant is smoked, it bring the wonderful smoked fragrance to bharta making it more delicious.  A perfect dish to try when you fire up your bbq grill.  Grill eggplant and make barta, you will love that. 
And before moving over to recipe Wish every Happy Tamil New Year.
Ingredients:
Eggplant/Aubergine - 1 medium OR 300 gms
Oil - 1 tbsp
Garlic – 1/2 tbsp [chopped]
Cumin Seeds - 1/2 tsp
Onion - 1 large
Tomato – 1 large
Green Chilli- 3 [to taste]
Red chilli powder – 1/2 tsp
Turmeric – 1/2 tsp
Salt - to taste
Crushed Kasuri Methi - 1 tsp [optional]
Cilantro – 1-2 tbsp chopped
Baigan Bharta chutney recipe  Roasted eggplant dip recipe
Method:
1. Wash, pat dry smear oil all over the eggplant (I forgot to apply the oil)
2.  Roast the eggplant in direct flame (medium to slow), rotating eggplant in all direct in regular intervals to gets it roasted properly.  Do this until you see the skin turns black and the eggplant becomes little soggy.  You can also insert a fork or knife in the centre of eggplant to check it's cooked well.
3.  Meanwhile finely chop onion, garlic, green chilli and tomato, keep aside.
4. Once eggplant roasted allow it to cool a bit, remove stem & peel of burnt skin and mash cooked eggplant.
5. In a pan heat oil add cumin seeds and let it crack.
[I used mustard oil for any bharta, you can use any cooking oil]
6. Add chopped garlic and roast until light brown, add chopped onion & chilli and fry until onion turns golden brown in medium heat.
7. Add turmeric and chilli powder and mix well.  Now add tomato and cook until soft, add mashed eggplant, salt, crushed kasuri methi and mix everything well.
8. Cook for 5-8 minutes in slow/medium flame or until everything gets cooked, add cilantro and off flame. 
SUTTA KATHIRIKKAI aubergine CHUTNEY  baigan bharta recipe
Variations:
~ You can add 1/2 of garam masala along with salt to that extra kick.  
~ Kasuri methi is optional, you can skip it if you like.
Have a nice day ~~

Masala Vada | Paruppu Vadai

Masala vada paruppu vade recipe
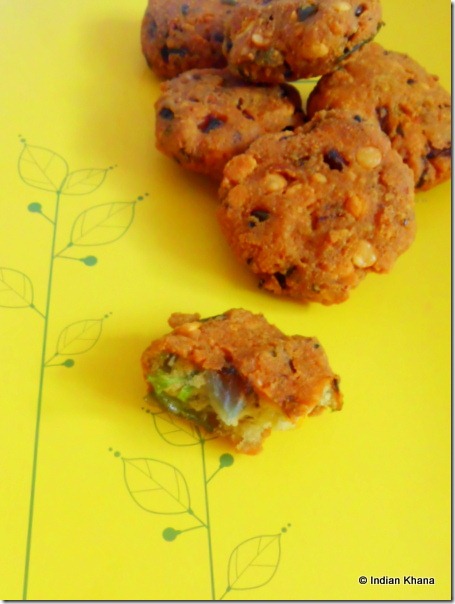
Masala Vada or masala vadai is one of those things that I make once in blue moon, urad dal vada or as we call it bada is more common in our place, I like masala vada as crunchy outside and soft inside it’s just perfect. and lucky for me I got the same effect too.   I made this for my in-laws on a weekend as they don’t know about masala/paruppu vade, as expected they liked it too.   And I thought it’s good to post this recipe for coming Tamil New Year, perhaps some motivation for me to make these beauties again.
Masala Vade Recipe
Ingredients: [Makes 22-25 vadas]
Channa Dal/Bengal Gram – 1 1/2 Cups
Onion – 1 Large
Green Chillies – 3
Dry Red Chillies – 2
Fennel Seeds – 1/2 tsp
Ginger – 1/2” piece [optional]
Salt – to taste
Curry Leaves – 1 sprig
Cilantro Leaves – 4-5 sprigs
Asafoetida/ Hing – 1/2 tsp
Cooking Soda – a pinch [sodium bi carbonate]
Oil – To deep fry
vadai masla vada recipe
Method:
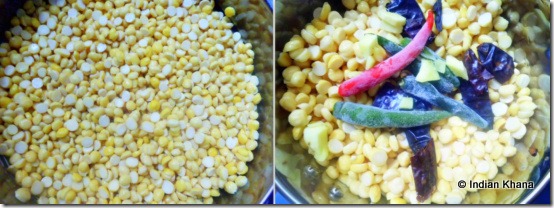
1. Wash and soak channa dal in water for 2 hours or more, drain water, rinse dal 1-2 times. 
2. Keep aside 1tbsp of soaked dal and grind remaining dal with green, red chillies,  fennel seeds, ginger into coarse paste.  Add 1-2 tbsp of water only if required.
Masala Vada recipe ingredients
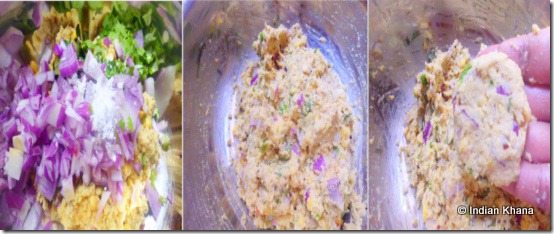
3. Finely chop onion, curry leaves and cilantro, add with grinded dal, mix everything well with salt, soda, asafoetida and reserve 1tbsp whole channa dal. Make small lemon size ball from dal mixture and flatten between both palms to shape it like cutlet/tikki.
Masala Vada recipe ingredients procedure
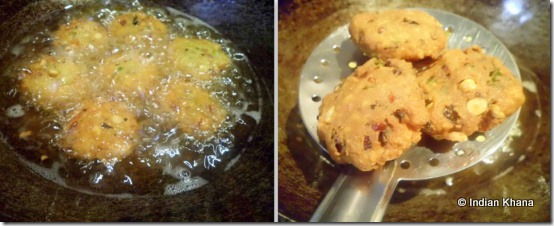
4. In a deep pan/wok heat oil for deep frying, drop carefully 4-5 vada in oil and cook in medium heat until both sides becomes nice golden brown. 
Masala Vada recipe ingredients procedure1
Serve hot/warm with tea/coffee or with meal. 
Paruppu vada masala vadai recipe
And incase you have leftover masala vada then don’t think too much just go ahead and make Vade Curry
Masala vade new year recipe
Variations:
1. You can add mint leaves, it adds good flavour to these vadas.
2. Instead of onion, you can try adding cabbage.
3. If you don’t want to deep fry then try it in paniyaram maker/pan but that will be slight change in taste.
Have a nice day ~~

Restaurant Review: Secret Recipe

I wanted to write restaurant reviews for yeas now but it was not happening due to various reason.  Thanks to few friends with their persistent nagging I manage start product review and today long over due restaurant review.  We went to secret recipe to celebrate one of our friend’s birthday and I clicked the picture in the hope that I will write review! 

Secret recipe is famous for it’s cakes & ice cream and has branches all over Singapore, Malaysia, it’s not really a restaurant but cafe-bistro type place to sit and catch up with friends.  I personally felt their dinning menu is limited and very limited for vegetarian (okie, let’s be happy at least they have vegetarian items), they have also removed few items from menu since I lasted visited them.   But as I said the place is for cakes, ice cream, shakes which has good selection. 

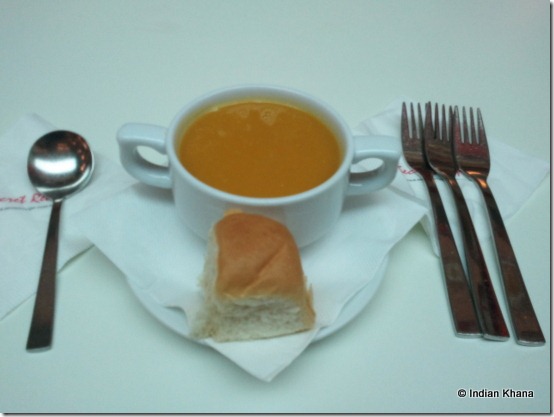
We started with curried pumpkin soup (served with a bun), which was delicious, this was one of the best pick of day.  And inspired from this I make my own curried pumpkin soup

Secret Recipe Review pumpkin Soup

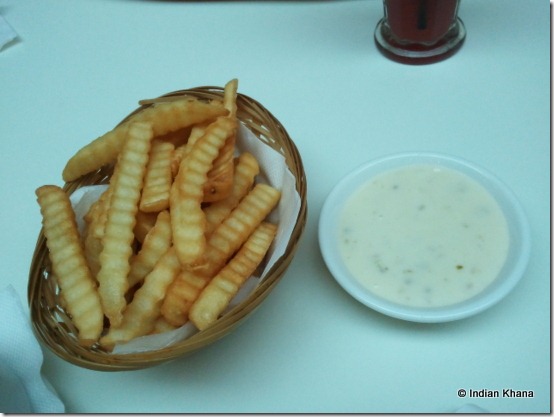
Also we order French fries, which was better than I expected, served with tartar sauce which was damn good.
Secret Recipe Review french fries

I ordered Chicken Satay, which was a total let down.  Menu says it’s a must try, but I am saying just ignore this you are not going to miss anything great.  The satay was like deep fried chicken with no taste and another let down was peanut sauce! There was everything wrong about this dish.

Secret Recipe Review chicken satay

Main course was simple, both my friends are vegetarian so they selected Oriental Style Soba served with chilli sauce (sauce was good though), one of them liked it and another one didn’t!  I tasted soba noodles and it was okie type. 

Secret Recipe Review soba noodles

I ordered fish and chip, fish was very oil, I couldn’t finish my portion. Below average for me.

Secret Recipe Review fish and chips

For drinks, me and one of my friend choose Caffe Latte, which was okie.  By the time it arrived it was already luke warm!

Secret Recipe Review caffe latte

Our another friend is big watermelon fan so as always she ordered watermelon juice.  I guess it was good.

Secret Recipe Review watermelon juice

And now comes the best part, Desserts.  I knew exactly what we going to order.  Secret Recipe’s most famous cake is their Chocolate Banana cake.  It just so good and they serve very generous portion.  You have to try this and you will love it too.

Secret Recipe Review chocolate banana cake

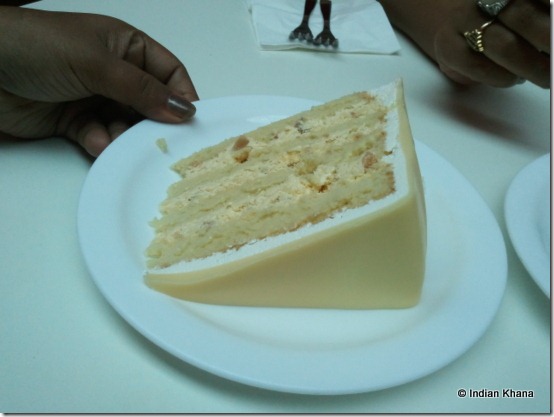
Their another best cake is White Chocolate Macadamia, I always order these 2 cakes.   White chocolate with crunchy macadamia is just so delicious.

White Chocolate Macadamia

Overall, if you visit secret recipe for their cakes, ice cream and drinks and you won’t be disappointed.   We went on a weekday for late lunch so the service was good as there were not many customer, if you visit during rush hours you can expect delay in service, we went to Plaza Singapura Outlet.

For 3 people we paid 80SGD.
Secret Recipe’s official website

Have a nice day ~~