logo


Festive Food Ganesh Chaturthi - Event Announcement

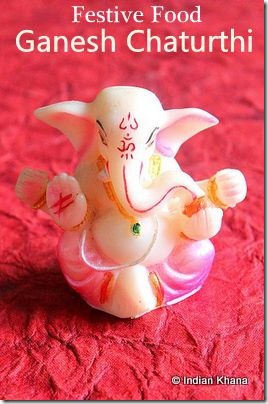
I wanted to start over my Festive Food Events for long now but then I kept delaying that.  Some of you may know/remember festive food events and participated, for others you want to know check out previous events roundups.  What better way to Shree Ganesh(start) the event again than with Ganesh Chaturthi, so come and join me to celebrate this year Ganesh Chaturthi and send your entries, as always you can send your recipes, how you celebrated the festive stories, pictures, decoration, shopping, market pictures etc.  Purpose of FF Events are to enjoy the auspicious festivals with enthusiasm and share our rituals, customs and happiness with the each other.  And special thanks to Prathibha for this beautiful picture she sent to use as logo.
FestiveFood Ganesh Chaturthi.jpg

Simple Rules of Festive Food Ganesh Chaturthi

1. Send in only new post/recipes or pictures, archive are not allowed for all of us to see something new. Link your post back to the event, use of Logo is appreciated.
2. Like all festive food events, this time too you can send anything like sweet, main dish, savoury snack……list goes on. If you wish you can share with us how Ganesh Chaturthi is celebrated in your region or house. You can also post any hand made arts, rangoli, celebration pictures etc
3. Event starts from 31st August 2012 and ends on 30th September 2012.
4. Bloggers/Non-bloggers are welcome to submit your entries.

Previous Festive Food Roundups …

Rakhi Roundup 2008
Diwali Roundup 2008 Part I, Part II & Part III
Makar Sankranti/Pongal Roundup 2009
Raksha Bandhan Roundup 2009
Summer Treat Roundup 2009 Part I & Part II
His Cooking Event Roundup 2010 Part I, Part II & Part III


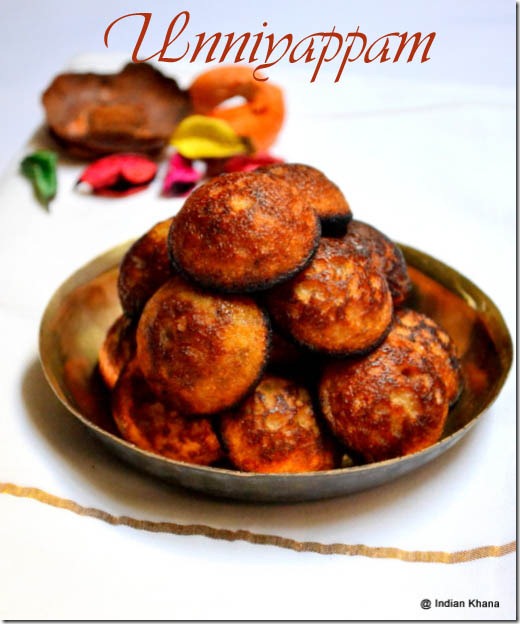
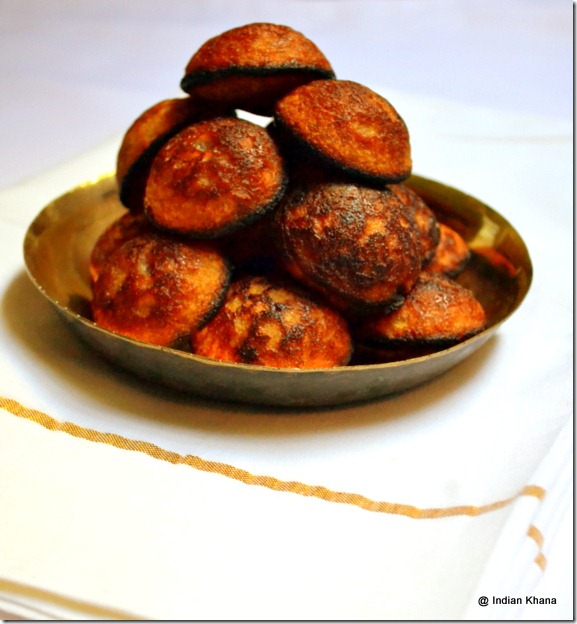
Unniyappam | Inippu Appam | Onam Recipes

unniyappam recipe

Wishing all readers Happy Onam.  For me Onam used to be having moong dal payasam, banana chips, unniyappam and other goodies that our Malayali neighbor aunty used to share with us.  After long time I enjoyed Onam last year with colleagues over sadhya of which managed to post Beans Thoran and Puli Inji, I was suppose to carry unniyappam on special demand but last moment I couldn’t do that.  To makeup for that this year I thought of preparing and posting to feast virtually ex-colleagues whom am missing a lot now! 
 
sweet appam banana appam  neyyappam recipe
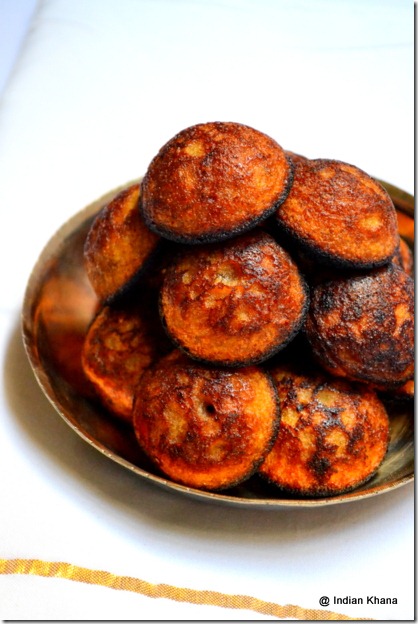
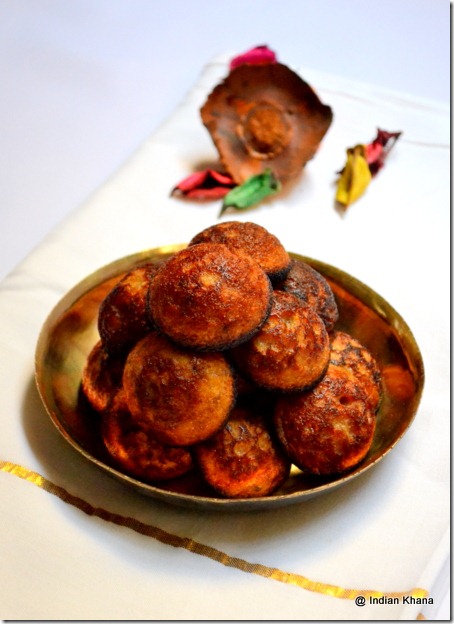
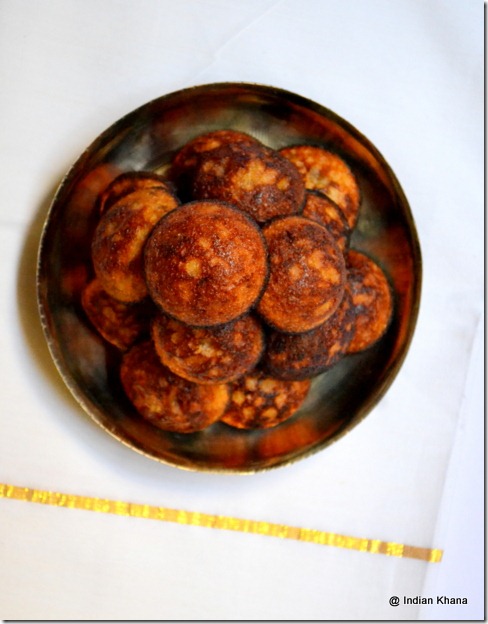
Unniyappam recipe is much easy than it sounds, I got this recipe from our neighbor aunty long ago.  Traditionally it’s deep fried in unniyappam pan which is deeper to hold oil but here I added less oil, you can do in any way you wish.  If you have ripe banana try any day for evening snack, don’t wait for Onam to enjoy these delicious unniyappam.

Kerala unniyappam onam sadhya recipe

Ingredients:
Rice Flour - 1 cup
Ripe Banana – 1 [Kadhali pazham/palayam kodan variety preferred]
Jaggery - 3/4 cup
Black Sesame Seeds – 1/2 tsp
Cardamon Powder - 1/4 tsp
Coconut Pieces - 2 tbsp [ I used grated coconut]
Ghee – 1 tbsp
Salt - a pinch
Water – 3/4 Cup
Coconut Oil/Ghee -  For frying

Neyyappam unniyappam recipe

Method:

1. Melt the jaggery in water, strain to remove any impurities and keep aside. Fry coconut pieces in ghee until golden brown.
Inippu Appam recipe
2. Mash banana well in a small bowl and keep aside. In another bowl add rice flour, salt, cardamom powder, fried coconut, sesame seeds.
neyyappam unniyappam onam recipe
3. Add mashed banana, melted jaggery water and mix well to form thick batter.
sweet banana unniyappam onam sadhya recipe
4. Batter should be like idli batter consistency.  Cover and keep aside to ferment for 1-2 hour.   Heat unniyappam or paniyaram pan, add 1/2 tsp of oil or ghee in each hole and fill it up with prepared batter.
Sweet paniyaram unniyappam recipe
5. Cook in medium heat until sides of appam gets brown, gently flip over other side, drizzle little oil and cook until golden brown.
Easy paniyaram unniyappam onam recipe
Serve warm.

Inippu banana appam unniyappam onam recipe
Notes ~
~ If batter is too thick add little water or milk. Or if batter is runny add rice flour, consistency should be similar to idli batter.
~ For deep frying fill paniyaram pan with oil and fry appam.  Oil will float on top of each hole.
~ You can ferment batter 5-6 hours if time permits.  I heat up my microwave for 30 seconds and keep batter inside for 2 hours.
~ If you don’t have paniyaram pan you can deep fry these in wok like small pakodas.
~ You can use wheat flour instead of rice flour too.

Have a nice day ~~

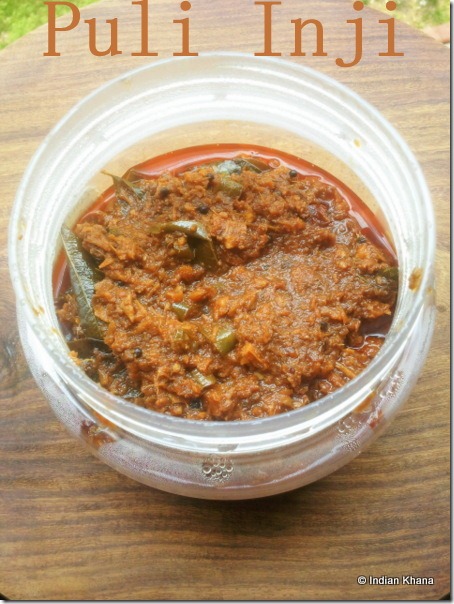
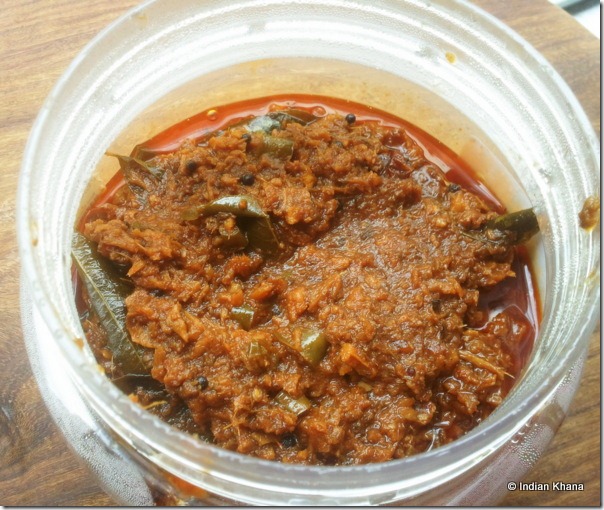
Puli Inji | Onam Sadhya Recipes

Inji Puli Onam Sadya Recipe
I am a big pickle fan, I used to eat pickles a lot though now a days it has reduced to a great extend thanks to DH!. This Puli Inji or Inji Puli as they call it was again made my ex-colleague for Onam Sadhya lunch and I took pictures. It was 1st time I had this puli inji and I instantly fall in love with it.  Fabulous as it looks it taste great too, I have made this couple of times in small quantity but never really got a chance to take pictures, let’s blame my laziness for it but that not going to stop me from sharing this wonderful tasty Inji curry recipe.  If you are not celebrating Onam never mind, you can still try this recipe and relish.  Other pickle you can try for sadhya is Instant Mango Pickle.

Ingredients: [Adapted from YummyOYummy]

Ginger - 1/4 Cup, finely chopped
Tamarind/Puli - large lemon-sized
Green Chillies - 5 - 6
Turmeric Powder - 1/4 tsp
Chilli Powder - 1/2 tsp
Grated Jaggery -  4 tbsp or to taste
Salt - To taste
Water – 11/2 Cup
For Tempering
Coconut Oil - 2 tsp
Mustard seeds - 1/4 tsp
Dry Red Chilies - 2
Curry leaves – 1 sprig

Onam Sadya Puli Inji Recipe-001

Method:

1. Soak the tamarind in 1/2 cup warm water for a 5-10 minutes.
2. Squeeze tamarind and pour the extract into a deep saucepan. Add a cup of water, salt, turmeric powder, chilli powder and bring it to a boil (do not cover with lid).
3. Reduce flame add the chopped ginger, jaggery and let it simmer until it reaches thick consistency, stir in interval. It would take more than an hour to achieve this consistency in slow flame. [adjust tamarind and jaggery if required]
4. Heat oil in a small pan add mustard seeds and allow to splutter. Add dry red chillies, curry leaves and fry for 1 minute,off flame . Pour tempering over the prepared puli inji.

Our Inji Puli is ready to be part of Onam Sadya. 

Ginger Pickle Inji Puli Onam Sadya Recipes

Have a nice day ~~

Beans Thoran | Poriyal | Onam Sadhya Recipes

Beans Stir Fry thoran poriyal recipe
This beans thoran was not made by me but by my ex-colleague for Onam Sadhya lunch, I just happily took the pictures, oh ya I did chop the beans though.   I make beans poriyal same way too except ginger and add carrot most of times.   It makes a tasty side dish for rasam rice than anything, a perfect comfort food and I like this with rasam rice too.   A simple yet satisfying stir fry for any day.  If you want something different then here is my carrot and broccoli thoran.

Ingredients:

Beans - 2 cup [chopped]
Shallots – 4-5 [chopped]
Green chillies – 4 [chopped]
Minced Ginger – 1 tsp ( optional)
Dry Red Chilli - 1
Cumin Seeds – 1/2 tsp
Mustard Seeds – 1/2 tsp
Curry Leaves – 2 sprigs
Turmeric Powder – 1/2 tsp
Urad Dal – 1 tsp
Grated Coconut – 1/4 Cup
Oil – 3 tbsp
Salt to taste
Water – 2-3 tbsp

Easy Beans poriyal thoran stir fry recipe onam sadya recipe
Method:
1. Heat oil in a pan add cumin, mustards seeds and allow to sputter, add urad dal, curry leaves sauté until golden brown.
2. Add  dry red chilli, shallots, ginger, beans, turmeric, salt and green chilli, stir well.
3. Sprinkle 2-3 tbsp water and cover the beans, cover and cook in medium flame for 5-7 minutes, stir in 2-3 times in between.
4.  Add grated coconut and stir well.  Cover and cook again for 5 minutes (stirring in intervals) or until beans gets cooked fully.
Serve warm with Onam Sadya or Rice, sambar, rasam. 

Easy Beans Thoran Poriyal Onam Sadya recipe

Notes~
1. Add 1 cup of grated carrot if you wish, add it in step 2 along with beans.
2.  Skip ginger if you don’t like.
3. Stir in regular interval while cooking to avoid beans from burning.
4. You can make this without coconut too, it still taste great.
5. For authentic Kerala style thoran, use coconut oil.
Have a nice day ~~

Seviyan Kheer | Semiya Payasam | Vermicelli Milk Pudding

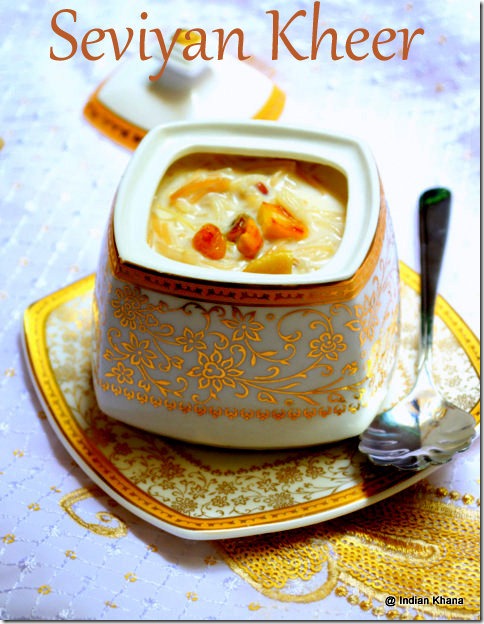
 Seviya Kheer Semiya Payasam Recipe
Seviyan Kheer or semiya payasam is one sweet that I make often simply because it’s most easy, quick to make with yummy result.  Most of the time it’s the last minute in a hurry sweet touch during festivals when we busy with other elaborate cooking.  One of the most loved Indian dessert has to be seviyan I guess due to it’s rich, creamy taste and easy preparation and a must during Eid.  I have used here condensed milk to give this kheer creamy texture you can skip it if you wish.  As Eid and Seviyan goes hand in hand what better than posting Seviya recipe during Eid. Before moving over to my beloved recipe wishing all celebrating Eid-ul-Fitr Mubarak, for rest enjoy the holiday and the yummy food. 

Ingredients:

Seviyan/Semiya/Vermicelli - 1 Cup
Boiled Milk - 3 Cups 
Sugar - 1/2 Cup [ to taste]
Condensed Milk - 2 tbsp [optional]
Cardamom powder - 1/2 tps
Cashew Nuts - 6-7 [chopped]
Raisins - 1 tps
Ghee/Clasified Butter - 1 tsp [optional]

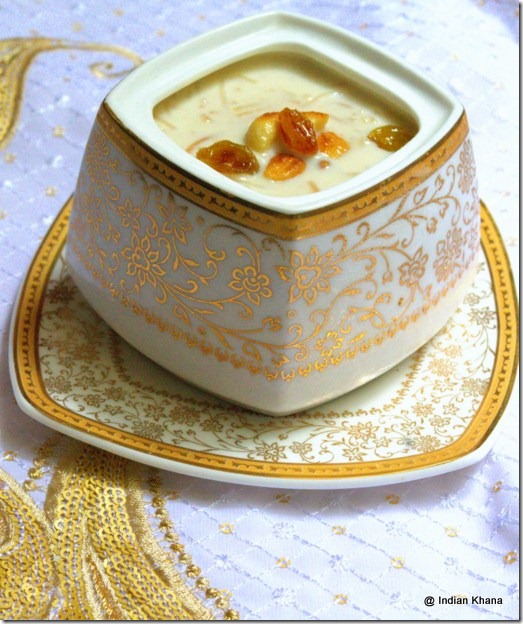
Easy Seviyan Kheer Semiya Payasam Vermicelli  pudding recipe

Method:

1. In a pan heat ghee, fry the cashews, raisins until golden brown in medium flame & keep aside OR dry roast the cashews in case of not using ghee.
2. In a same pan fry the seviyan/semiya until golden brown and keep aside OR dry roast the seviya in case of not using ghee.
3. Add boiled milk to seviyan and cook in medium flame until it starts to boil, add sugar, condensed milk and stir well to mix.
4. Cook for 3-4 mins until seviya gets soft on medium flame, add half of cashew, raisins, cardamom powder, give a gentle stir and off flame.
5. Garnish with remaining nuts.  Serve warm or cold.

seviyan dessert semiya without milk recipe indian festival food

Variations ~

~ You can cook semiya in water and then add milk, this way semiya doesn't get thicker very fast.
~ You can skip condensed milk if you wish.
~ Normally payasam tends to get thicker once it cools down, you may add boiled milk again and stir while serving.
~ Add few stands of saffron for richer kheer.
~ I used less than 1/2 cup of sugar, adjust sugar according to taste.

Other few recipes you can try for Eid Dawaat.

Starters/Drink
Aloo Tikki
Bada | Vada
Masala Vada
Sabudana Vada
Dahi Bhalle
Spring Rolls
Tandoori Chicken
Almond Pistachio Milk

Main Course
Bondi Raita
Aloo Raita
Palak Puri
Chole
Dum Aloo
Navratan Korma
Paneer Butter Masala
Chicken Masala
Chicken Rasa Curry
Chicken Cashew Masala
Matar Keema
Mughlai Mutton Masala
Prawn Masala
Matar Pulao

Desserts
Apple Rabdi
Badam Katli
Fruit Trifle Pudding

Bakes
Apple Compote Financiers
Mango Tutti Frutti Cake
Marmer Cake

Have a nice day ~~

Tricolor Cupcakes with Cream Frosting| Independence Day Recipes

Tricolor Vanilla Pandan cupcakes recipes
Quick, easy and colorful cupcakes for Independence Day, sound wonderful?  I wanted to do something special and decided to make cupcakes as today is DH birthday, also new addition in family his nephew birthday now on 15th August.   So it’s triple celebration today and thus tri color cupcakes perfectly fits the bill.  These cupcakes not only pretty but also very easy to prepare, just whisk the batter, add color and bake it, it doesn’t get easier than this. 

Easy Vanilla tricolor cupcake with frosting designs recipes
For any occasion or party you can add different colors of your choice.   Try this and you are going  to love it.  Before going to recipe, Happy Independence Day peeps & Happy Birthday Tanish. 

Easy vanilla pandan nation independence day cupcakes recipe
Ingredients: [Yields 6 Cupcakes]

For Cupcakes
Milk – 1/4 Cup
Butter – 1/4 Cup [ melted and cooled ]
Egg – 1
Sugar – 1/2 Cup
Vanilla Extract –1 /2 tsp
Plain Flour – 3/4 Cup
Baking Powder - 1/2 tsp
Salt - 1/8 tsp
Pandan Flavor - 1 tsp [optional]
Green Food Color - 2 tsp
Orange Food Color - 1 tsp
For Icing
Whipping Cream - 1/2 Cup
Icing Sugar - 1/2 Cup
Orange & Green Food Color - 2 drop each [optional]

Pandan Vanilla Cupcake with whipped cream icing recipe step vise pics
Method:

1. Preheat oven to 180C, line a muffin tin with paper liners.
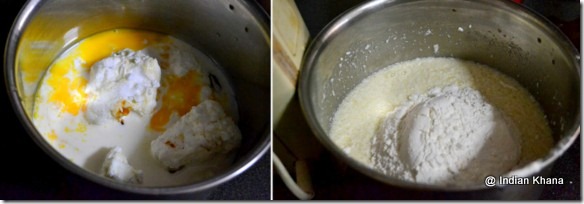
2. In a medium bowl, whisk together egg, milk, melted butter and vanilla extract, sugar,  until smooth. [I didn't melted butter before using!]  
3. In a another bowl, sift together flour, baking powder and salt. Add with wet ingredients and whisk until batter is smooth.
Cupcakes
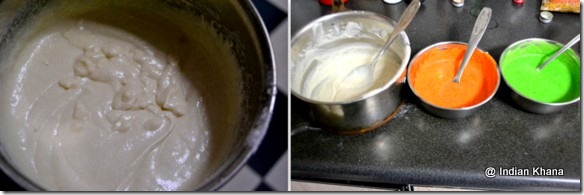
4.Take two small bowls and divide batter equally.
5. In one bowl add orange food color and mix well to incorporate.
6. In another bowl mix pandan flavor (if using) & green food color and mix well too.  So we have now white, green and orange color batter.
easy cupcake pattern frosting icing recipe
7. Divide green batter evenly into prepared muffin cups. Now divide white batter evenly into muffin cups, centering it on top of green batter (do not smooth it). Divide remaining orange batter evenly over white batter.
cupcakes recipes
8. Bake for about 20-25 minutes or until a toothpick inserted into the center of each cupcake comes out clean.
9. Cool for 5 minutes before removing cupcakes from pan.  Now cool cupcakes completely on a wire rack before frosting.
vanilla pandan easy frosting creaming design recipe
For Frosting

1. In a bowl beat icing sugar and whipping cream till stiff peaks.  Fill in it piping bags and do desire design. 
Vanilla cupcakes with whipped cream frosting recipe
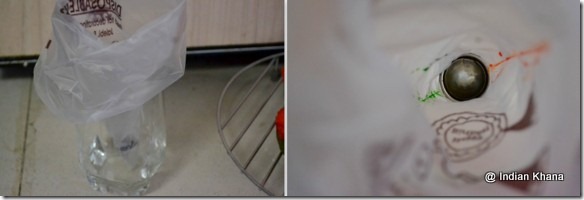
2. Or to add light hint of colors, add desire tip (I used star tip) on piping bag and keep the piping bag in a tall glass. 
3. Use a paint brush or wooden skewer to paint stripes of color on inside of bag, starting at tip until 3/4 of bag.  I did very thin line you can make it thick/wide if you wish.
Easy cupcakes with eggless options recipe
4. Fill whipped cream, twist top of bag to close it and squeeze icing out of until you start seeing color. 
5. Decorate the cupcakes as you wish.  Below is few example I did.  
easy cupcake icing technique with step wise pics
Decorate with sprinkles if desire. 

Vanilla flavor cream frosting cupcakes recipe
Notes ~
~ For eggless version
1. You can replace one egg with 1/4 cup of whipped tofu OR
2. Add 1 mashed banana, it also adds nice flavor to cupcakes.
~ I added pandan flavor, you can skip it and let be just vanilla cupcakes.
~ Skip the colors and make it as plain vanilla or pandan cupcakes.
~ Since these cupcakes are quite colorful, in frosting I added bare minimal of color. If you making it vanilla cupcake then add wide strips of colors, it makes frosting looks beautiful.
~ One more time will say it, do not smooth batter while filling cupcake liners. 
~ You will not get frosting in same quantity as you see in step-wise picture, that frosting I did for another cake so the quantity is very high.

Have a nice day ~~

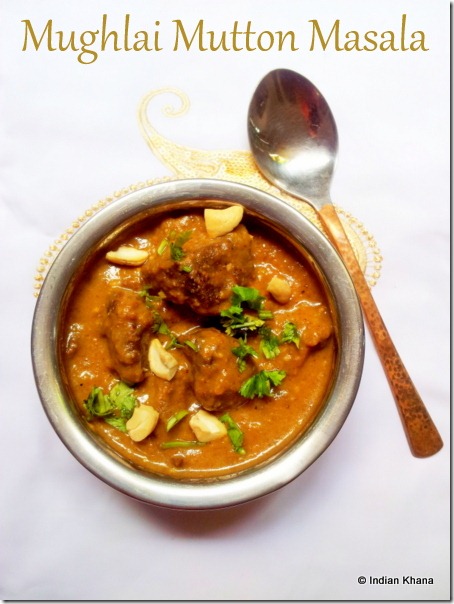
Mughlai Mutton Masala | Eid Recipes

Shahi Mughlai Mutton Curry Masala Recipe
One of famous Eid recipes is mutton biryani or mutton masala/curry.  Remember my Keema Matar that DH made, this time I tried my hands on mutton and made the famous Hyderabadi mughlai ghost/mutton curry.  It was smooth, creamy and delicious with mutton cooked to perfection with yoghurt and spices in true mughlai style. Don’t let the long list of ingredients let scare you it’s just add the normal spices & freshly grounded spices adds zing to this recipe.  This goes well with naan, paratha, jeera rice, peas pulav, vegetable biryani or with plain steamed rice.   If you look for some delicious, rich mutton recipe then try this. 

Ingredients:

Mutton – 500gms
Onion – 2 [large]
Turmeric powder – 1/2 tsp
Yogurt/curd – 1/2 cup
Water – 1/2 cup
Cilantro – 1 tbsp [chopped]
Mint Leaves – 1 tbsp [chopped]
Salt – to taste
Ghee – 3 tbsp
Oil – 3 tbsp
Cashew Nut - 8-10 [broken]

To Grind
Onion – 3 (large)
Green Chillies – 2
Ginger-Garlic Paste - 1 tbsp
Cilantro & Mint leaves – 4 tbsp [chopped]
Coriander Seeds – 1 tbsp
Cumin seeds – 1/2 tsp
Green Cardamom – 2
Black Cardamom – 1
Black Pepper Corns – 5
Cloves – 1
Cinnamon stick – 1/2 inch pieces
Dry Red Chilli – 2

Easy Mughlai shahi mutton ghost curry masala recipe

Method:

1. Grind all the ingredients with little or no water listed under ‘to grind’ and keep aside.
2. Wash & cut mutton into medium size cubes.
3. Heat ghee in a pressure pan and fry the mutton pieces for few minutes or until they are slightly browned. Remove and keep aside. Fry cashews until golden brown and keep aside too. 
4. In the same pan, heat oil and fry the sliced onions until golden brown.
5. Now add the ground masala and sauté for 2-3 minutes, add fried mutton pieces, turmeric powder and salt.
6. Fry over slow flame until the oil separates around 7-8 minutes. Add 1 cup water, mix everything well and pressure cook for 4-5 whistles.
7. Allow cooker to cool, when the steam releases completely open cooker and keep on gas flame again.  Now add beaten yogurt 1 tbsp at a time and and mix well to combine. Simmer for 5 minutes in slow to medium flame until desired consistency is reached. Garnish with chopped mint, cilantro and cashews.

Mughlai ghost masala recipe hyderabadi

Notes ~
~ If you wish you can add water and curd together and pressure cook for 3 whistles instead of doing it in 2 steps.  
~ You can add or reduce green and red chillies to your taste but normally mutton recipes are on spicy side.
~ If you don’t want to use ghee replace it with oil.

Have a nice day ~~

Uppu Seedai | Janmashtami Recipes

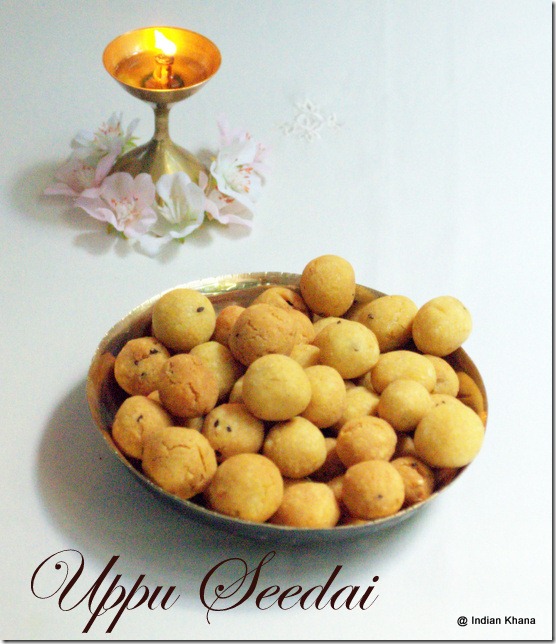
Uppu Seedai-recipe
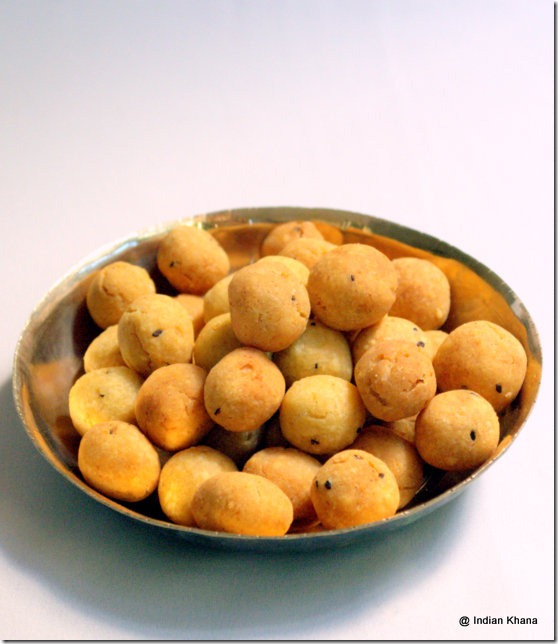
Wishing all Happy Janmashtami celebrating whomever today or tomorrow.  For us Krishna Janmashtami day of fasting so we don’t make any goodies and the neivedyam my mom use to make was very different, I shall post some time that I am sure most of you will say it’s very new.    We are not celebrating any festive this year but all this seedai recipe in blogs has tempted me from last year to try.  I learnt seedai recipe from my sister’s friend when I was kid, once I was over her house and she made it in front of me and give me seedai or golgula as we use to call it back then packed in box to take back home from that time I am big fan of seedai and force my sister to make for me (oh ya that time I was not allowed to go near gas) after I that I tried it few times and never had any bursting experience.  I never knew seedai burst in oil until I read in blogs, so don’t think too much if you haven’t had any unpleasant experience just go ahead and try this.  Not only for Gokulashtami, it also makes a wonderful snack.   Another easy and quick recipe Krishna Jayanthi recipe is Poha Kheer you can try.

Easy Seedai recipe gokulashtami-recipe
Ingredients:
Rice Flour – 1 Cup
Urad Dal Flour – 2 tbsp
Butter/Ghee – 2 tbsp
Sesame Seeds – 2 tsp [ I used white & black 1 tsp each]
Asafoedtida – 1/4 tsp
Grated Coconut – 2 tbsp
Salt – to taste
Water – To knead
Oil – For deep frying

 Uppu-seedai-krishna janmashtami-recipe
Method:

1. Heat a pan/wok and sauté rice flour for a minute or until it starts to steam.  Don’t let flour change it’s color.

2. Sauté for a minute urad flour and coconut.

seedai

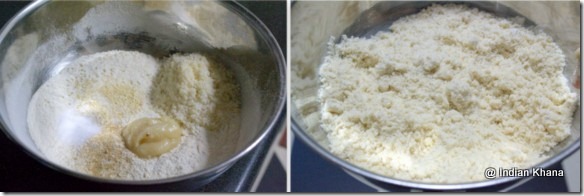
3.  In a bowl sieve both flours and add coconut, salt, sesame seeds, salt, butter/ghee, asafoedtida and rub with hands to get wet sand like consistency. 
~ I forgot to add black sesame and added that later so you don’t see that in this pic!

easy seedai recipe

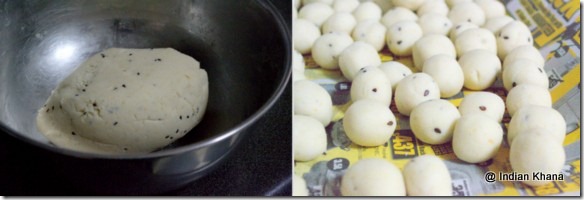
4. Now add water in small quantities and mix well to form soft pliable dough.  Keep aside for 5 minutes.

5.  Take a pinch and make into small ball and repeat same for rest of dough, arrange in newspaper or kitchen towel.   While making balls don’t apply any pressure, do it gently and don’t try to get perfect round shape.  

palakayalu-seedai-recipe

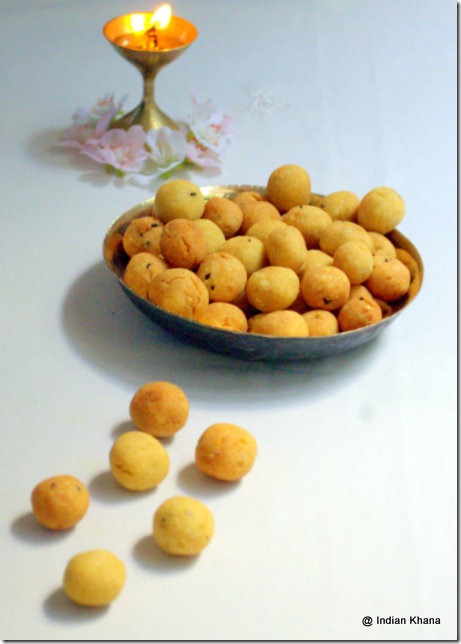
6. Heat oil for deep frying and add seedai in batches.  Deep fry in medium-slow flame until golden brown or oil’s 'shhh' sound ceases with stirring in regular interval for even cooking.

seedai-gkulashtami-recipe-easy

7. Drain in paper towel.  Store in air tight container after seedai comes to room temperature.

Uppu-seedai-krishna jyanthi-recipe

Note ~
~ You can use either white or black sesame seeds if you wish.
~ Fry seedai on small batch first if you think they might burst.
~ Don’t apply any pressure while rolling balls or make it smooth to avoid it from bursting in oil.
~ You can prick seedai with tooth pick to avoid bursting.

Have a nice day ~~

Pineapple Tofu Manchurian | Indo Chinese Recipes

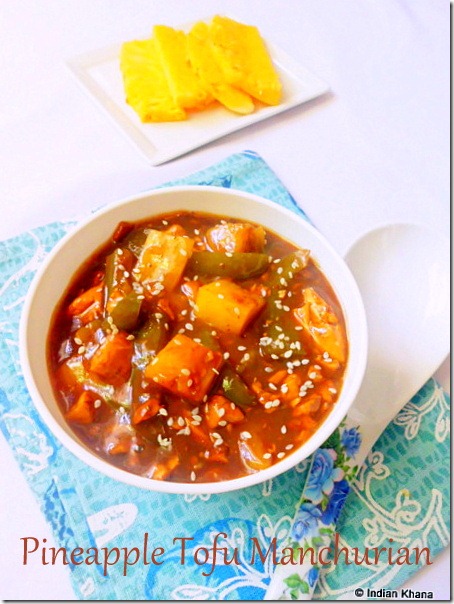
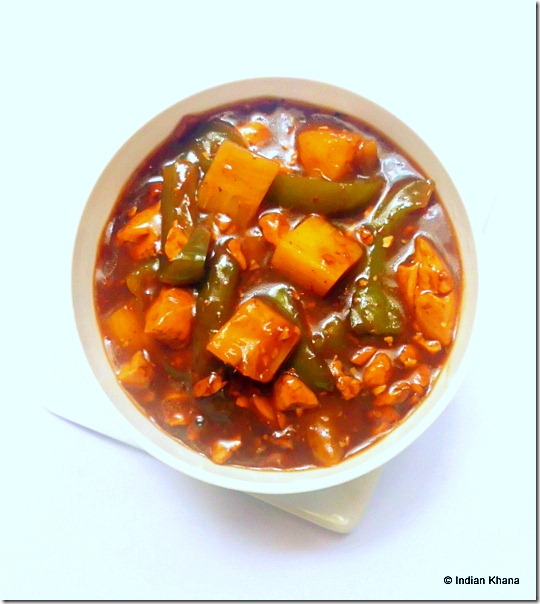
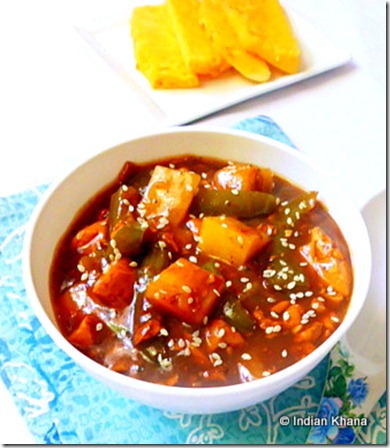
Pineapple Tofu Manchurian Recipe
Well it’s not really a Indo Chinese recipe but I am making one here so bare with me though I can assure you the result is awesome.  If you like Manchurian and feel guilty of eating fried version then this is for you.  There are multi benefits of this recipe like it’s easy, quick, guilt free, tasty and can be made in jiffy isn’t it wonderful?  I was having batch after batch of large, fresh, juicy pineapple giving me chance to try few new things one of which was my pineapple fried rice.  After pineapple fried rice and this manchurian, tried few juices and shakes, hopefully can post those soon too.   Coming back to this recipe; fresh, juicy pineapple with sweet & sour sauce along with hint of spicy Chile-garlic sauce give this Manchurian a kick.   This goes well with any fried rice or noodles or with just plain steamed rice.  I used fresh pineapple, you can used canned ones too.

Easy Pineapple Tofu Vegetrian manchurian recipe
Ingredients:
Pineapple Chunks – 3/4 Cup
Firm Tofu – 1
Capsicum - 1
Oil – 2 tbsp
Minced Garlic – 1 tbsp
Minced Ginger – 1 tsp
Sesame Seeds – 1 tbsp [optional]
For Sauce
Soy sauce – 1 tbsp
Tomato Ketchup – 1 tbsp
Brown Sugar – 1 tbsp
Vinegar – 1 tbsp
Cornstarch – 2 tsp
Pineapple Juice – 1/4 cup
Chilli-Garlic Sauce – 2 tsp [optional]
Vegetrian tofu pineapple manchurian indo chinese recipe


Method:

1. Whisk together pineapple juice, vinegar, soy sauce, ketchup, chilli-garlic sauce, sugar & corn starch in a small bowl until smooth.
2. Cut capsicum in long strips and tofu into 1/2” pieces. Marinate tofu for 10 minutes with 1/2 of prepared sauce.  Keep side remaining sauce.
3. Heat 1 tbsp oil in  pan and sauté tofu for 2-3 minutes on both side or until golden brown, keep aside. 
4. Add the remaining oil to pan, add garlic, ginger and cook until fragrant for about 30 seconds. Add bell pepper and cook, stirring often, until just tender for 2 to 3 minutes.  Add reserved sauce and cook until thickened, about 1-2 minutes in medium to slow heat.
~ Add 2-3 tbsp water if sauce becomes very thick. 
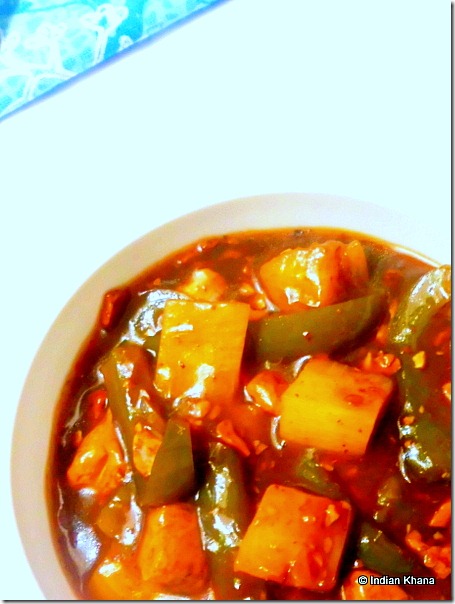
5. Add the tofu and pineapple and stir gently.  Simmer for 2 minutes, garnish with sesame seeds (if using).

Easy indian chinese tofu pineapple manchurian recipe
Note ~
1. You can use different colors capsicum.
2. If having leftover tofu, place in a container cover with water & keep in refrigerator.  You can keep it for 4-5 days with changing water every day.
3. If you wish you can reduce pineapple to 1/2 cup. 
4.  If required only add salt as we are using soya sauce normally salt is not required. 
5. Instead of chilli-garlic you can use any hot spicy sauce. 

Have a nice day ~~

Plum Streusel Muffins Recipe


I have to accept the fact that I like baking with fruits, you can see from my recipes most of my baked goodies used fruits. So here again I tried to make something from fresh, juicy plums. I tried to avoid but it was way to tempting to use plums in baking. I wanted to try streusel muffins for long now and here came a perfect opportunity to grab. Making these muffin is more easy than the name, you have to trust me on that. It can be done in jiffy and the result is delicious, soft muffins. Sweet & sour plums, almond flavor with streusel topping is wonderful combination. It makes a easy and fuss-free breakfast or snack for kids lunch box or bake these and keep for Iftaar/sheri. You can also check my open-face plum cake recipe. I tried this recipe from Taste of Home and halved it to suit my needs.


Ingredients: [ Yields 8 muffins]

Butter - 1/4 cup softened
Sugar – 1/2 cup
Egg - 1
Almond Extract – 1/2 tsp
Vanilla Extract – 1/4 tsp
Plain Flour – 1 cup
Baking Powder – 1 tsp
Salt – 1/4 tsp
Chopped Fresh Plums – 3/4 cup
For Streusel Topping:
Brown Sugar – 2 tbsp
Plain Flour – 1 tbsp
Ground Cinnamon – 1/2 tsp
Cold Butter – 2 tsp
Chopped Walnuts – 2 tbsp
Coarse Sugar – 1/2 tbsp

Method:
1. In a large bowl, cream butter and sugar until light and fluffy.


2. Add eggs & beat well, add in extracts and mix. Sift flour, baking powder, salt and add to creamed mixture alternately in small batches.

3. Fold in plums and mix gently, don’t over do it.

4. Fill greased or paper-lined muffin cups three-fourths full.


5.Preheat oven to 180C and for topping, in a small bowl, combine the brown sugar, flour, cinnamon, cut in butter until crumbly. Stir in walnuts. Sprinkle over batter; sprinkle with coarse sugar.
~ I did a mistake and mixed coarse sugar together with rest of ingredients.


6. Bake for 20-25 minutes or until a toothpick inserted near the center comes out clean.


7. Cool for 5 minutes before removing from pans to wire racks. 


It stays a week to 10 days if refrigerated, just warm 20-30 seconds in microwave before serving and enjoy these cuties.


Notes ~
~ For eggless option, add 1/4 cup of beaten silken tofu.
~ You can try this with any fruit of your choice.
~ Make sure plums are not very sour.
~ You can bake this as plum muffin and without streusel topping too.


And this goes to Lubna’s Joy from fasting to feasting V.

Have a nice day ~~